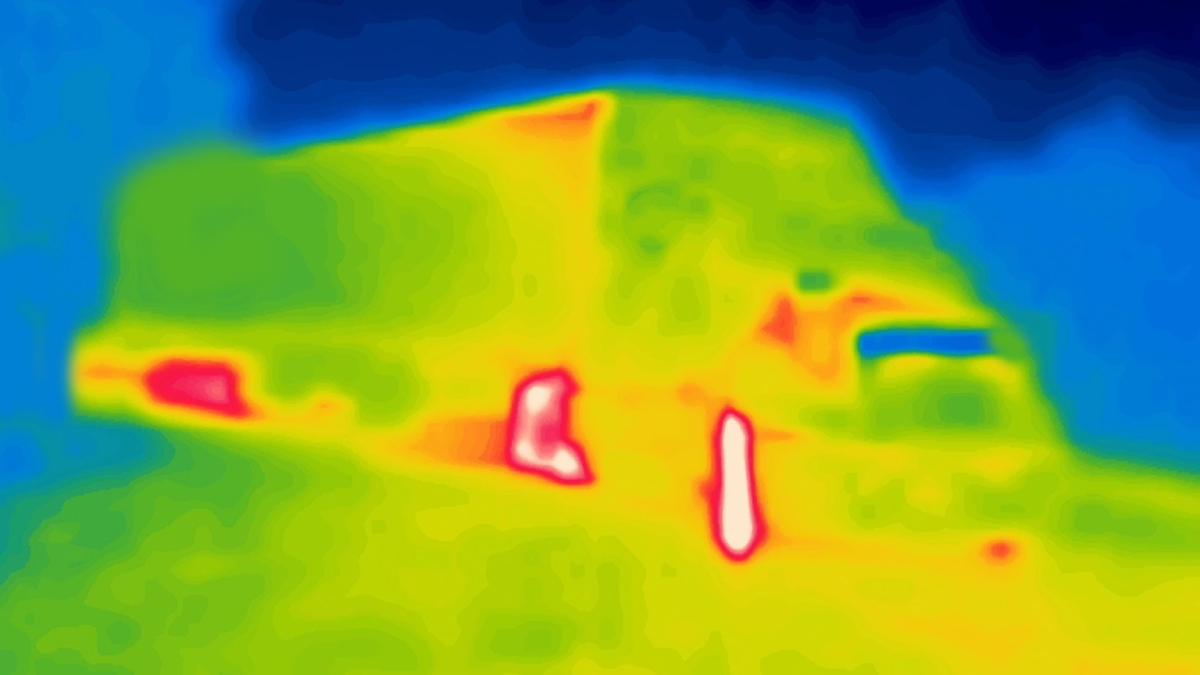
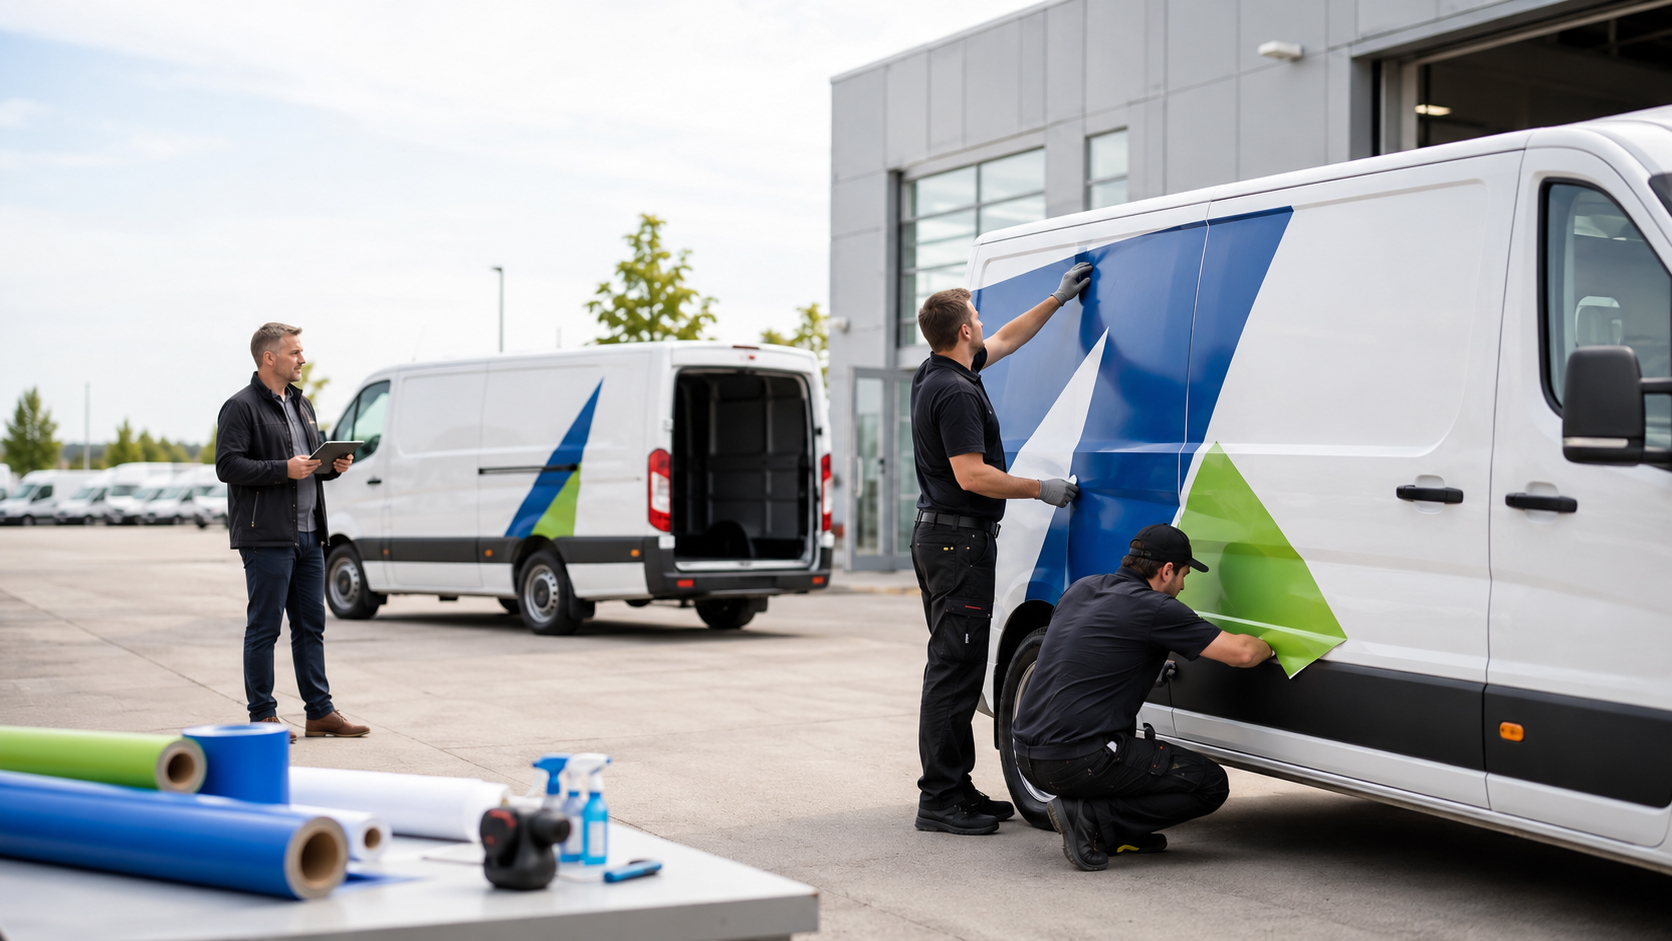
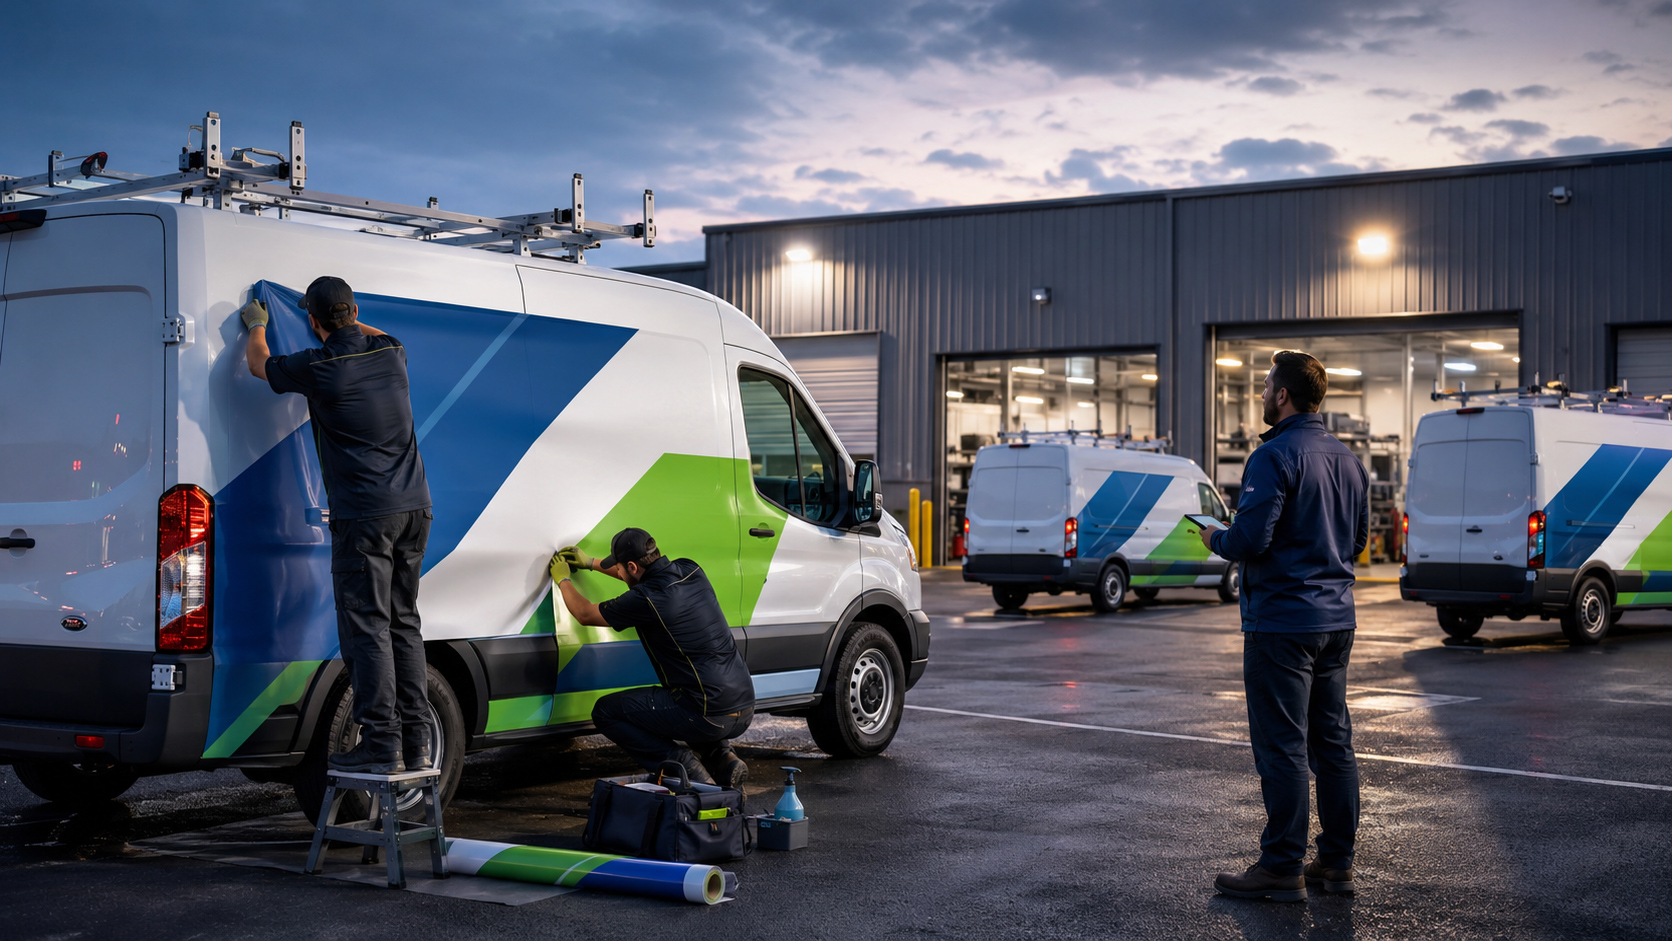
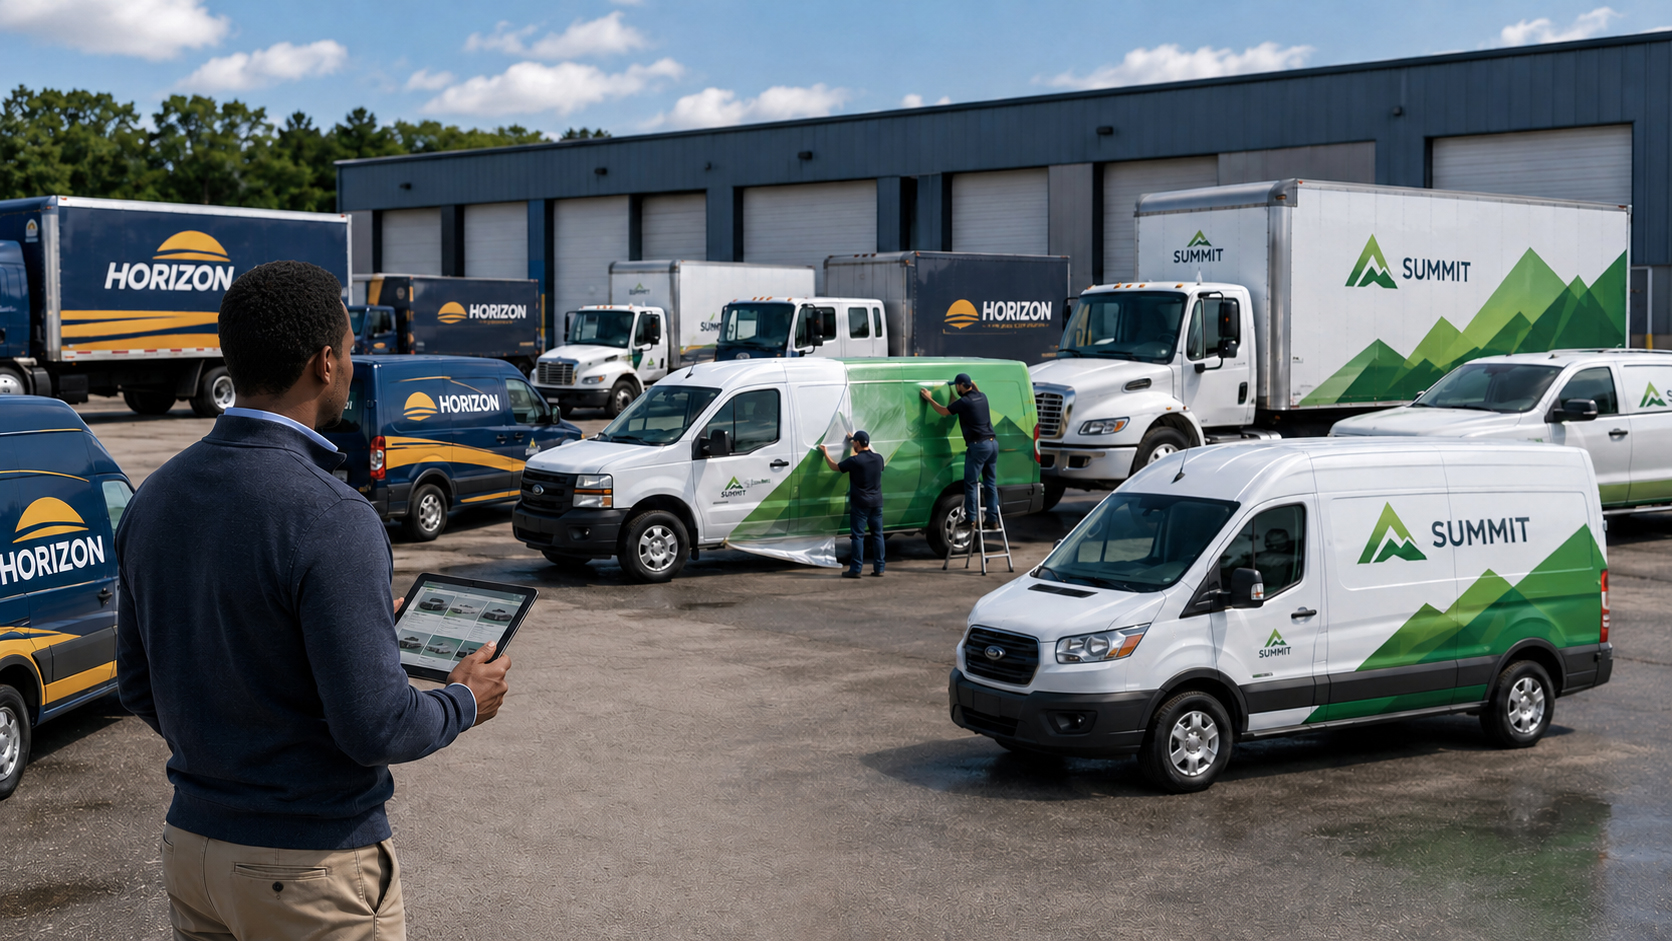
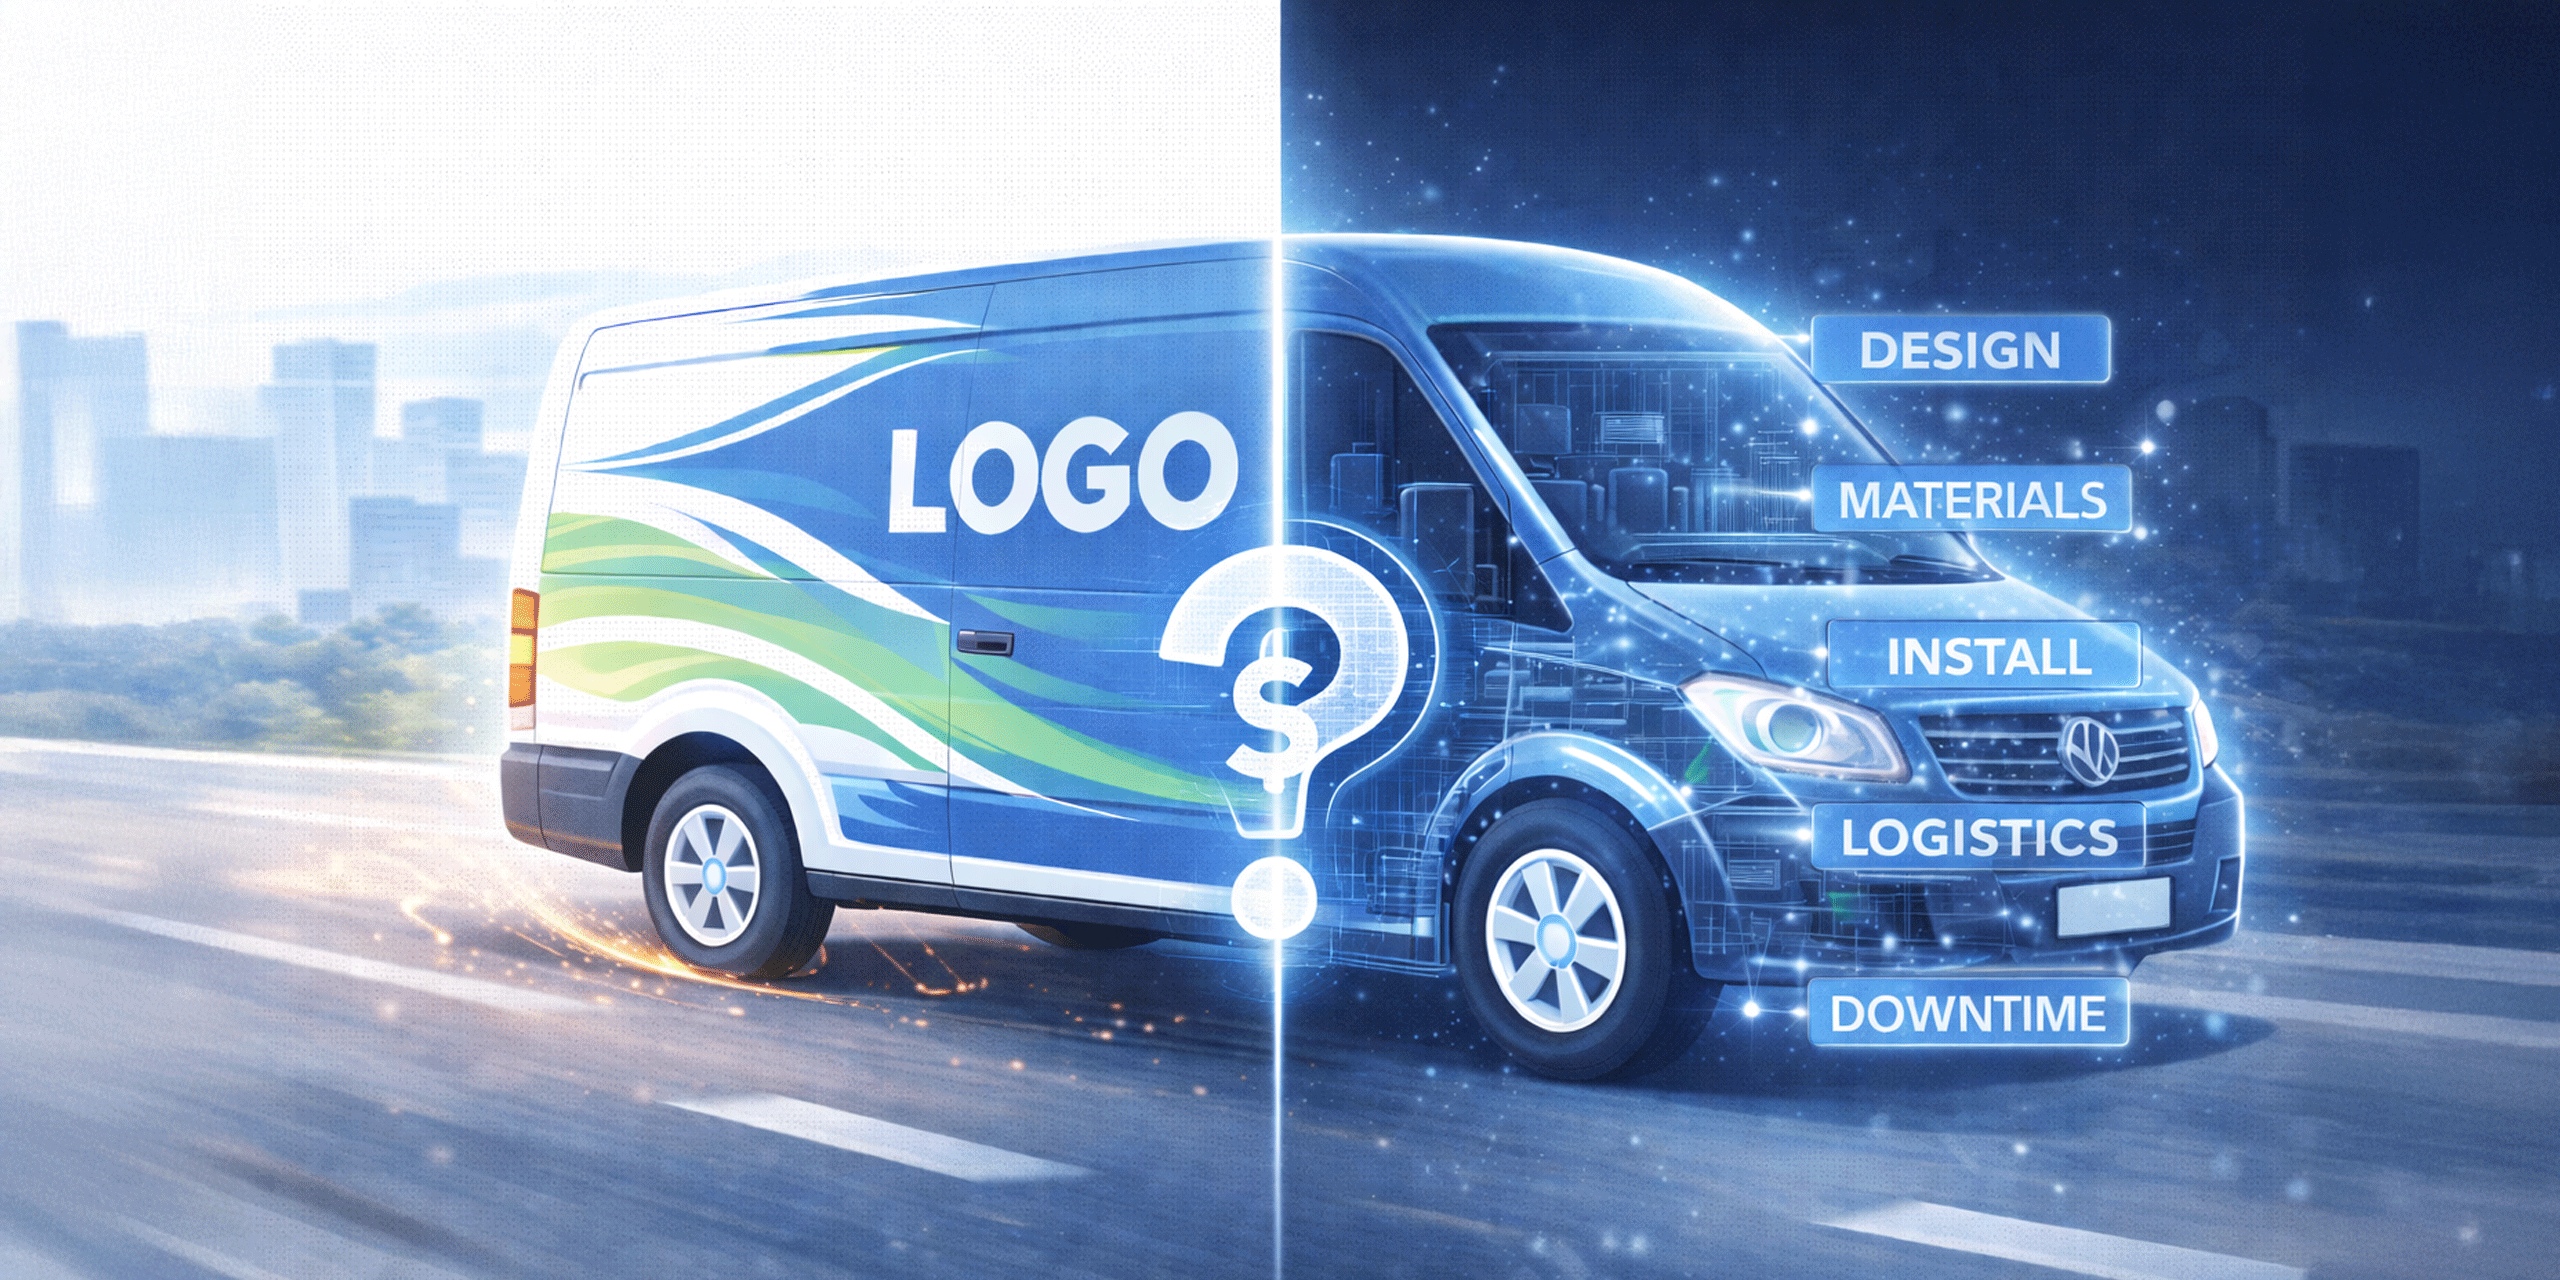
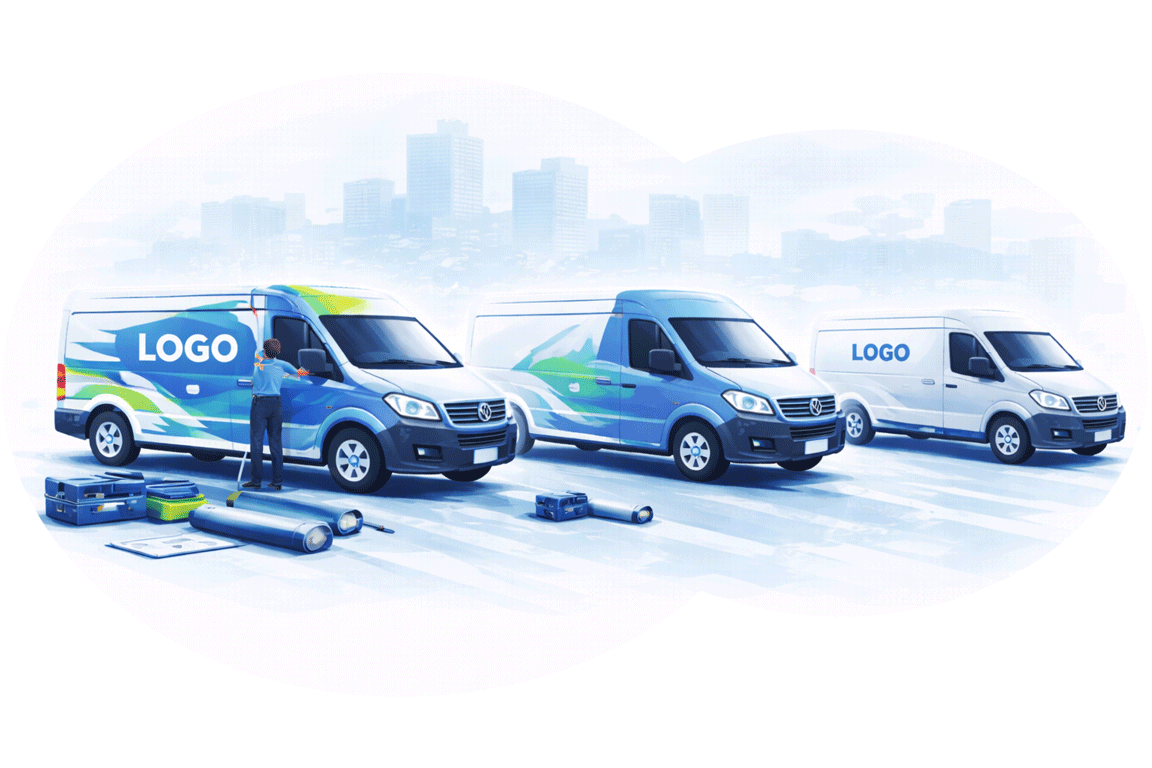
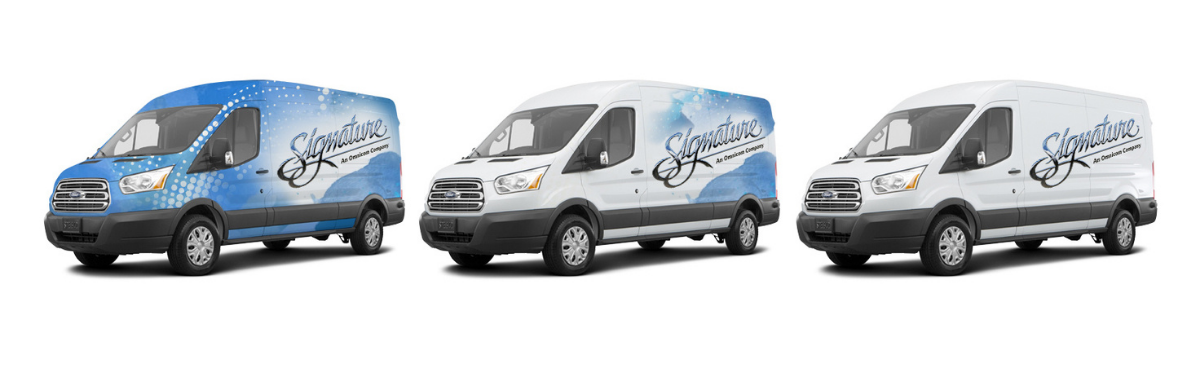
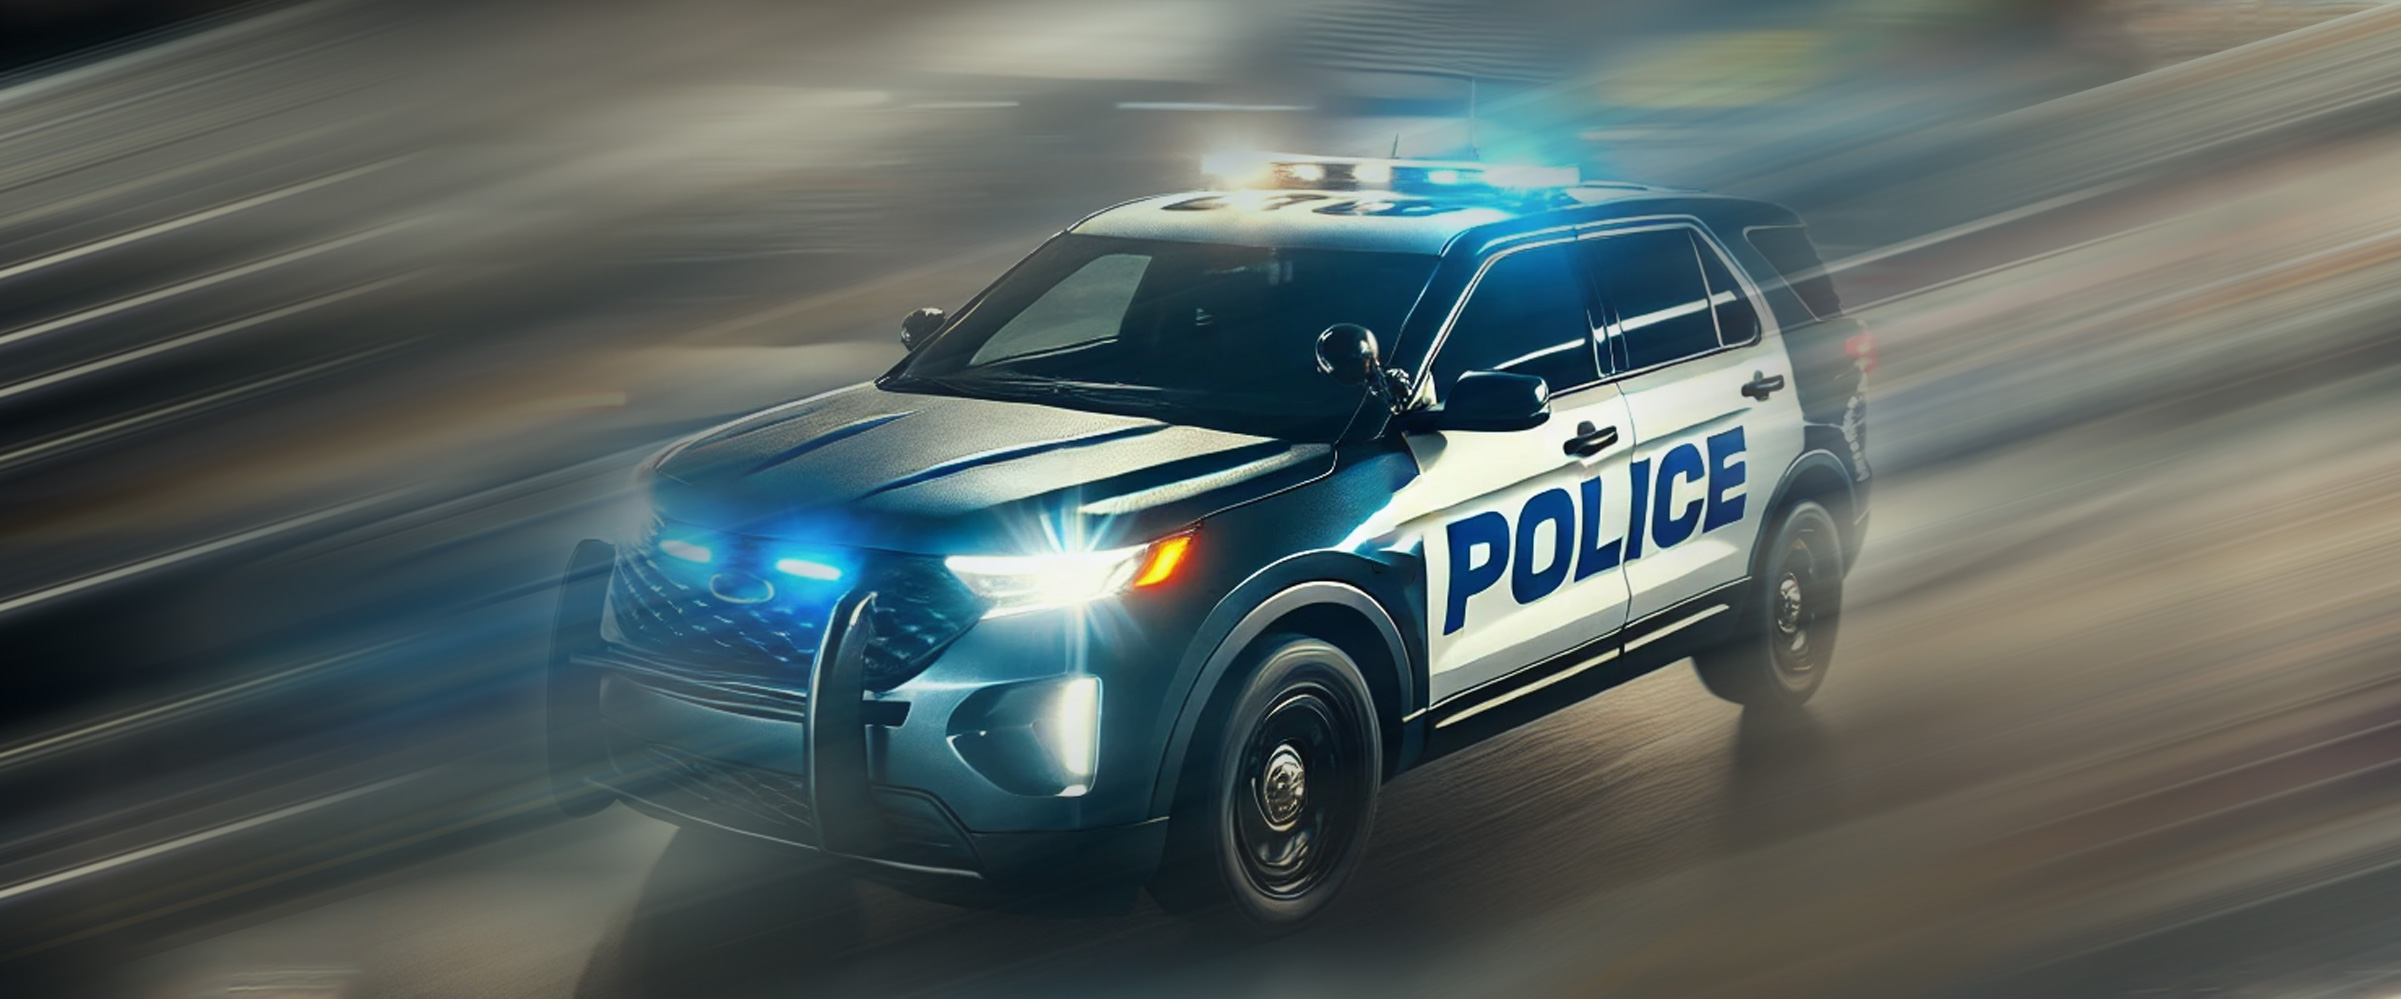
Signature Graphics is thrilled to offer the latest in performance film technology: 3M™ Cooling Film. When temperatures rise, driver comfort and fleet efficiency can suffer. 3M™ Cooling Film is a highly reflective performance film engineered to help reduce heat buildup in vehicles without using additional energy. It’s designed to address critical challenges of heat exposure on driver comfort, fuel efficiency, and the integrity of temperature-sensitive cargo.
3M™ Cooling Film reduces heat buildup at the source whether it’s applied to last mile vehicles, service or first responder vehicles, refrigerated vehicles, passenger buses, or even rail. And it’s quick and easy to apply, meaning you still enjoy the simple logistics and low downtime Signature Graphics is known for.
Cool Where it Counts
When the weather turns hot, intense sun and scorching pavement can take a toll on drivers and the cargo they deliver. Maintaining comfortable interior temperatures is essential for safety, job satisfaction, and efficiency. Here’s how 3M Cooling Film can help you stay ahead of the heat without impacting your fleet logistics.
Reflects up to 85% of the sun’s thermal energy and keeps roofs 10-30oF cooler.
Improves driver comfort by reducing interior temperatures by up to 10oF.
Limits heat exposure to temperature-sensitive cargo.
Fast, flexible Installation minimizes downtime.
Enables smoother routes by reducing heat-related slowdowns during frequent stop-and-go deliveries.
Improves the energy efficiency and range of EV fleets.
Sturdy coating resists the elements and maintains high reflectivity that lasts.
Backed by a 5-year warranty.
These benefits add up fast. The instantly increased operator comfort and product integrity is hard to put a price on, but Most companies see an ROI on their balance sheets in as little as 2 years.
Unmatched Efficiency for Unparalleled Results
3M™ Cooling Film outperforms even well-known approaches to heat management. The new cooling film offers fast installation, removability, comes with a 5-year warranty, and cools interiors by +5°F (2-3°C) more than traditional white paint. And it because it’s installed on low-visibility roofs, it doesn’t impair vehicle wrap or branding. With 3M™ Cooling Film you get passive cooling, increased efficiency, more stable interior temperatures, and more comfortable operators.
Stop High Temperatures from Scorching Your Fleet Efficiency
Better cooling helps improve comfort, save fuel, reduce costs, and improve operational efficiency. And when you pair advanced technology from 3M with Signature’s solutions-based approach you’ll get an experience that’s second-to-none.
Contact Signature Graphics and talk to our representatives about how 3M™ Cooling Film can help you fight heat buildup and keep your fleet cool.
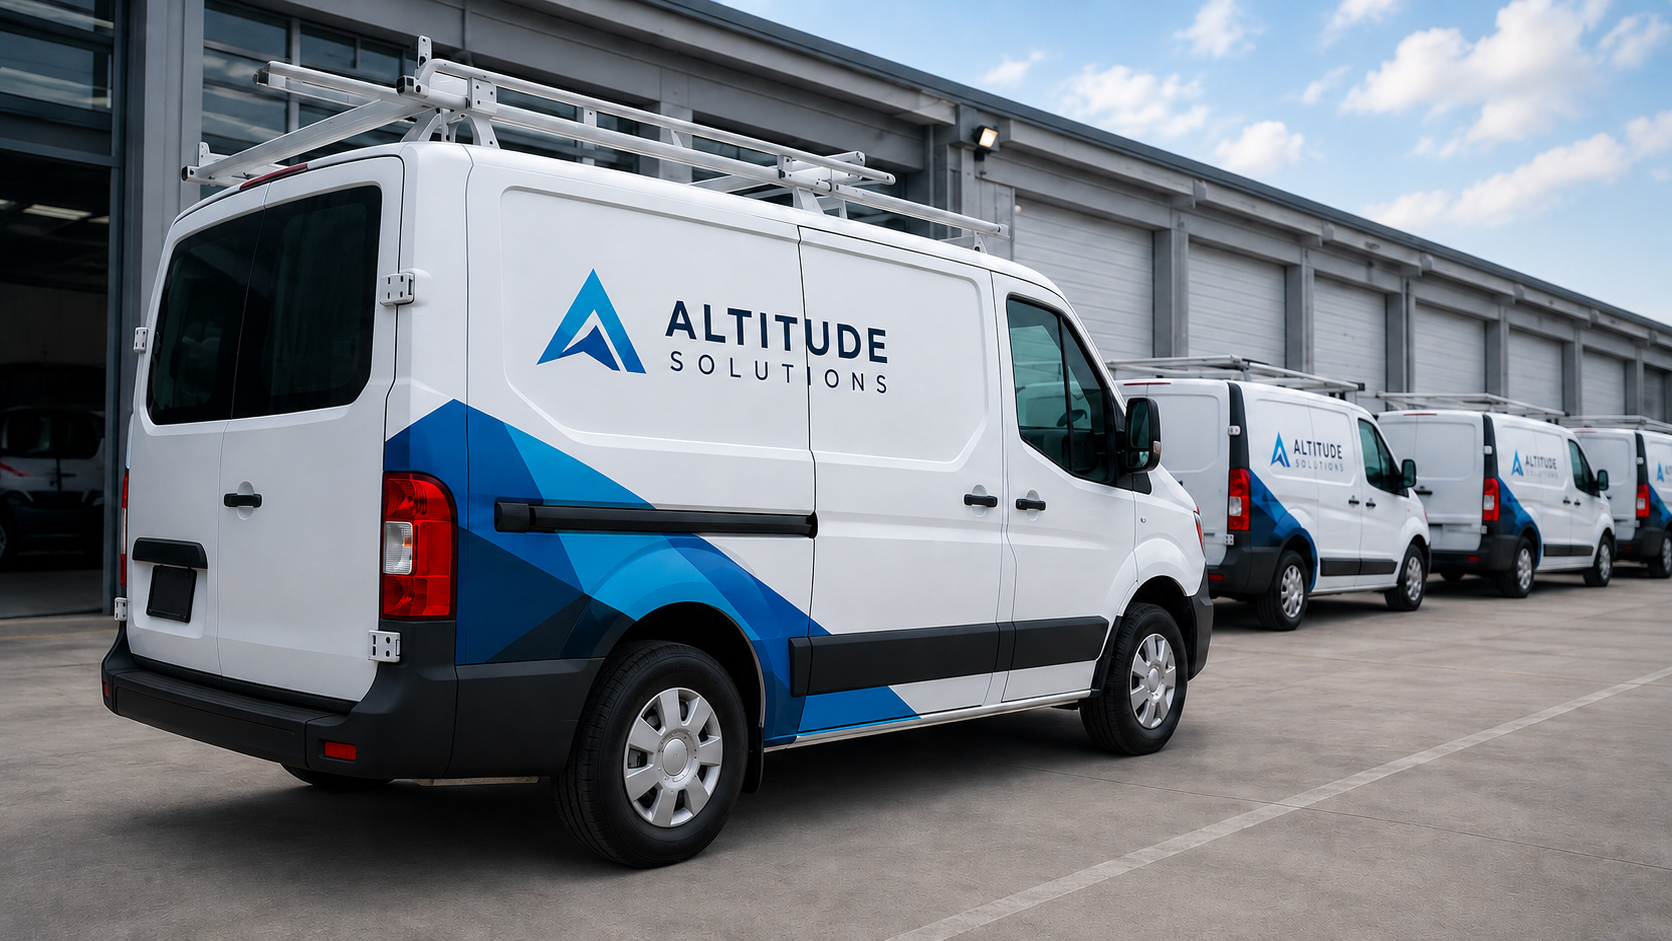
Leased vehicles can solve a lot of fleet problems.
They help companies add capacity, replace aging assets, respond to seasonal demand, support new markets, or move quickly after growth. However, they also create a branding question that many teams do not think through early enough:
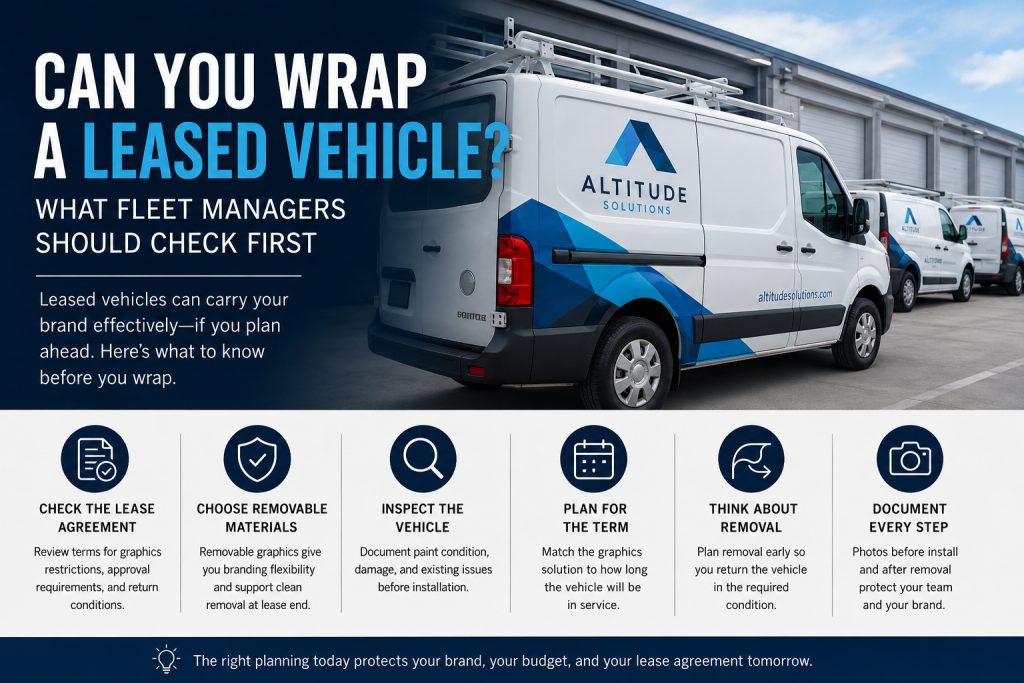
Can you wrap a leased vehicle?
In many cases, yes. But fleet managers should not treat a leased vehicle the same way they treat a company-owned asset. Before graphics go on the vehicle, the team needs to check the lease terms, vehicle condition, material choice, installation plan, and removal requirements.
That step matters because the vehicle eventually has to go back.
A wrap may look great while the vehicle works for your brand. But if the lease restricts graphics, the paint has problems, or removal creates damage, the project can cost more than expected.
So before you brand a leased fleet vehicle, slow down and confirm what the vehicle, the lease, and the business actually allow.
Can You Wrap a Leased Vehicle?
Yes, many companies can wrap or brand leased vehicles, especially when they use removable graphics and return the vehicle in the required condition.
However, the lease agreement controls the rules. Some agreements allow non-permanent graphics. Others restrict vehicle alterations, adhesive materials, full wraps, or anything that changes the return condition. Several wrap providers note that leased vehicles often can receive wraps as long as the modification remains removable and the vehicle returns in acceptable condition, but the lease terms still matter.
For fleet managers, that means one thing: check before you install.
Do not assume the vehicle qualifies for a full wrap just because vinyl can come off. Instead, review the lease, talk to the leasing company if needed, and document the vehicle before the graphics go on.
1. Check the Lease Agreement First
Start with the lease agreement.
Look for language about vehicle alterations, decals, wraps, adhesive graphics, paint condition, removal requirements, and end-of-term return standards. If the agreement does not clearly answer the question, ask the leasing company or fleet lessor in writing.
This step helps you avoid problems later.
For example, the lease may allow temporary or removable graphics but require full removal before return. It may also require the vehicle to come back with no adhesive residue, paint damage, ghosting, or visible surface changes.
Before installation, confirm:
Whether the lease allows graphics
Whether the lessor requires approval
Whether full wraps, partial wraps, or decals are allowed
Whether graphics must come off before return
Who handles removal
What condition the vehicle must be in at turn-in
Whether any penalties apply for damage or residue
Once you know the rules, you can choose the right graphics approach.
2. Choose Removable Vehicle Graphics When Flexibility Matters
Next, think about the material.
A leased vehicle often needs a graphics solution that looks professional while the asset stays in service and then comes off cleanly when the lease ends. That is why removable vehicle graphics often make more sense than treating the vehicle like a permanent wrap project.
3M specifically notes that temporary graphic wraps can help companies brand leased trucks and vans with removable wrap films. 3M also describes changeable graphic films as short-term vinyl films designed for flexibility, durability, conformability, and easier removal, with an expected performance life of up to two years depending on use.
That does not mean every leased vehicle needs the same material. The right option depends on the vehicle surface, lease length, brand visibility, weather exposure, washing, graphics coverage, and removal timeline.
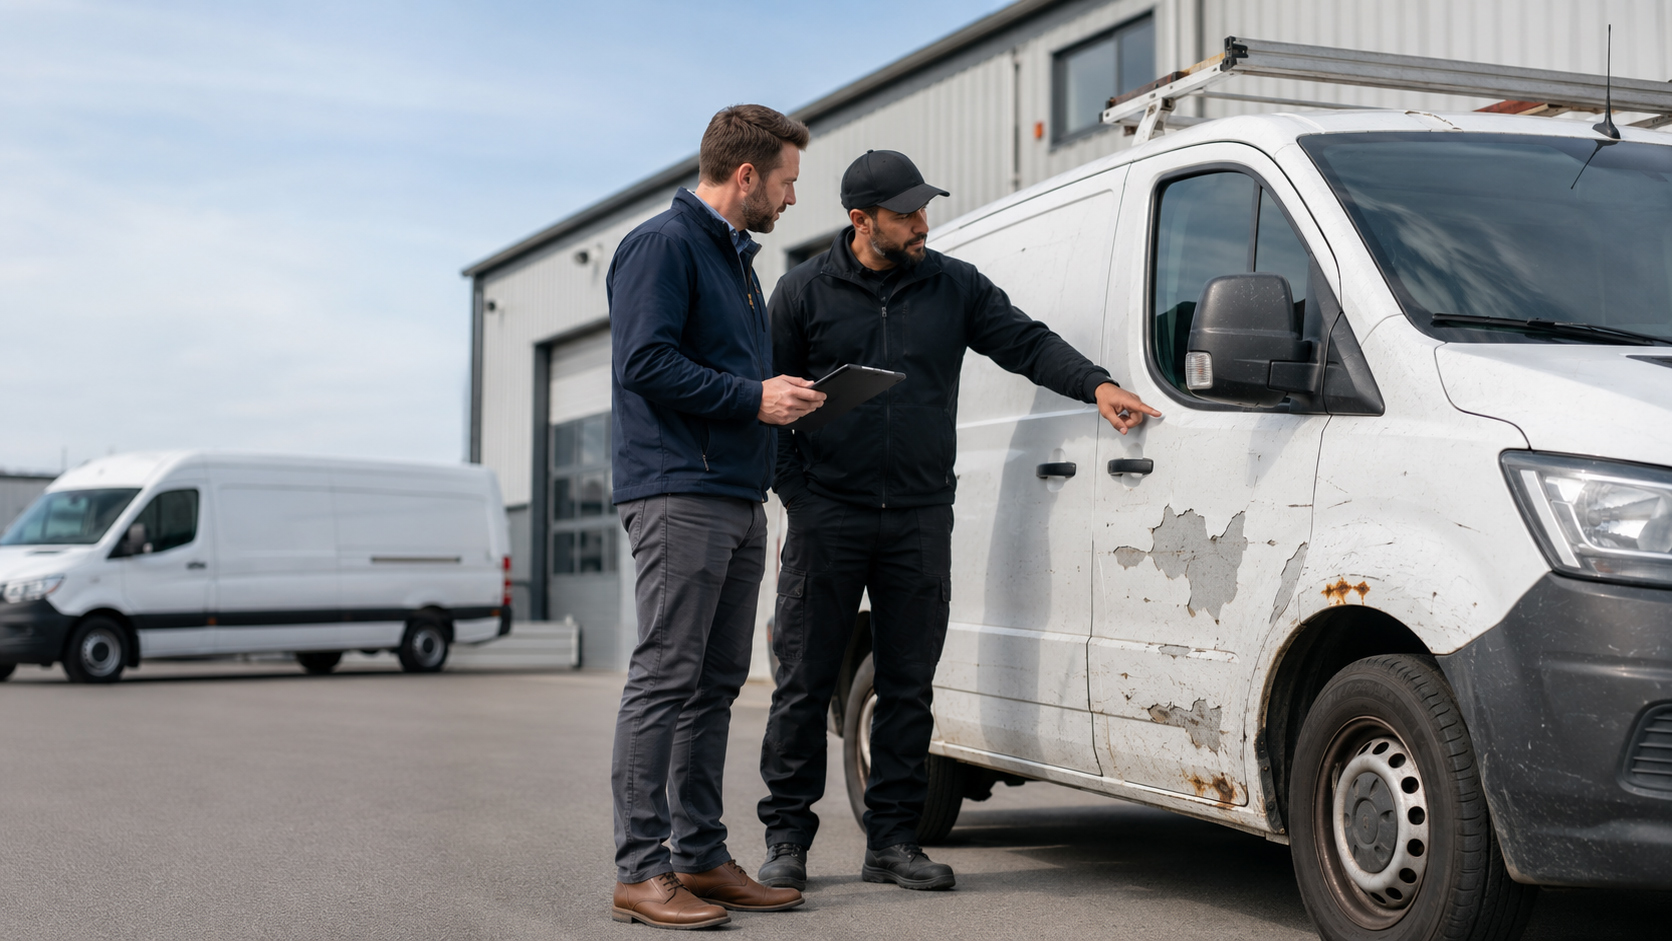
3. Inspect the Vehicle Before You Wrap It
After you confirm the lease terms, inspect the vehicle.
A leased vehicle may look clean from a distance but still have issues that affect installation or removal. Dents, scratches, rust, peeling paint, old decals, poor paint repairs, and worn surfaces can all create problems.
This matters because the wrap depends on the surface underneath it.
Before graphics go on, document:
Paint condition
Existing scratches or dents
Rust or corrosion
Peeling clear coat
Previous body repairs
Old decal residue
Areas with chipped paint
Any panels that may need repair first
Take photos before installation. That gives the fleet team, graphics provider, and lessor a clear record of the vehicle’s condition before branding begins.
4. Match the Graphics to the Lease Term
Then, match the graphics plan to how long the vehicle will stay in the fleet.
If the lease only has a few months left, a full wrap may not make sense. The installation cost, removal cost, vehicle downtime, and return requirements may outweigh the value.
However, if the leased vehicle will represent the brand for several years, a more complete graphics package may make sense.
Ask these questions before choosing the graphics:
How long will the vehicle stay in service?
How visible is the vehicle to customers?
Does it need full branding or simple identification?
Will the company return, renew, or buy out the lease?
Will the graphics need to come off soon?
Does the brand campaign have an end date?
From there, you can choose full graphics, partial graphics, spot decals, temporary graphics, or a lighter branding package.
Can you wrap a leased vehicle
5. Think About Removal Before Installation
Fleet teams often focus on installation first. However, leased vehicles require a removal plan from the beginning.
Eventually, someone has to remove the graphics. If the team waits until the vehicle return date, the process can become rushed and expensive.
Before installation, decide:
When the graphics need to come off
Who will remove them
Where removal will happen
How much time removal may take
What photos the team needs after removal
What condition the vehicle must meet at return
Whether the same provider should install and remove the graphics
This matters because removal can reveal problems that no one noticed earlier. Old paint, weak clear coat, previous repairs, or improper material choices can make the process harder.
A good removal plan protects the vehicle and the brand.
6. Use Temporary Graphics for Campaigns, Rentals, or Short-Term Routes
Leased vehicles often support temporary business needs. So, in many cases, temporary vehicle graphics may fit better than permanent-style fleet branding.
Temporary graphics can help with:
Seasonal routes
Short-term service coverage
Market launches
Event vehicles
Rental vehicles
Overflow capacity
Pilot programs
Acquisition transitions
Vehicles waiting for a permanent fleet rebrand
This approach gives the company a branded presence without locking the vehicle into a long-term design.
It also helps the team avoid overinvesting in assets that may leave the fleet soon.
7. Keep Brand Standards Consistent
Even if the vehicle is leased, rented, or temporary, customers still see it as part of the brand.
Because of that, the graphics should not look improvised. The vehicle may carry a smaller graphics package, but it still needs to follow the brand standards.
That includes:
Logo placement
Color use
Contact information
Website URL
Service messaging
Unit numbers
Safety markings
DOT or compliance markings
Reflective graphics, if needed
Proof photo requirements
Temporary does not have to mean inconsistent. A leased vehicle can still look like it belongs to the fleet.
8. Coordinate Installation Around Vehicle Availability
Leased vehicles still need to work.
They may run routes, visit customers, carry equipment, or support branch operations. Because of that, installation planning matters just as much as material choice.
Before the installation date, confirm:
Where the vehicle will be
Who controls vehicle access
Whether the vehicle will arrive clean
Whether installers need after-hours access
How long the vehicle can stay out of service
Whether old graphics need removal first
Who approves the final installation
Who receives proof photos
That coordination helps the team avoid missed appointments, rushed installs, and inconsistent results.
When Should You Not Wrap a Leased Vehicle?
Sometimes, the best answer is no.
Do not move forward with leased vehicle graphics until you resolve the issues below:
The lease does not allow graphics
The lessor will not approve the application
The vehicle has damaged paint or rust
The lease ends too soon to justify the cost
The vehicle needs body repair first
The return condition requirements are unclear
The team does not have a removal plan
The vehicle cannot come out of service long enough
The brand need is too short-term for a full wrap
In those cases, fleet managers should consider spot graphics, removable decals, magnetic signs, temporary graphics, or no branding at all.
How Signature Helps With Leased Vehicle Graphics
Signature Graphics helps fleet managers and brand teams choose the right graphics approach for leased, rented, and short-term fleet assets.
That means looking at the lease terms, vehicle condition, brand standards, material needs, installation timing, and removal plan before production starts.
For some leased vehicles, a full graphics package may work. For others, removable graphics, temporary campaign graphics, or a lighter decal package may make more sense.
The goal is simple: make the vehicle represent the brand while it works, then keep the process organized when the graphics need to change or come off.
FAQs About Leased Vehicle Wraps
Can you wrap a leased vehicle?
Yes, many leased vehicles can receive wraps or graphics, but the lease agreement decides what the company can and cannot do. Fleet managers should check the lease terms and get approval when the agreement requires it.
Do leased vehicle wraps have to come off before return?
Often, yes. Many lease arrangements require the vehicle to return in its original or approved condition. Because of that, teams should plan removal before installation begins.
Are removable graphics better for leased vehicles?
Usually, removable graphics make sense for leased vehicles because they give companies branding flexibility and support cleaner removal. However, the right material depends on the vehicle, lease term, surface condition, and graphics timeline.
Can a leased vehicle wrap damage paint?
A wrap can create problems if the vehicle has weak paint, rust, peeling clear coat, poor repairs, or if the team uses the wrong material or removal process. That is why inspection and proper removal matter.
Can you put temporary graphics on a rental vehicle?
Sometimes. The rental agreement controls what the company can add to the vehicle. Always confirm approval first, then choose a material designed for short-term use and clean removal.
What should fleet managers check before wrapping leased vehicles?
Fleet managers should check the lease terms, approval requirements, vehicle condition, paint quality, material choice, installation timing, removal plan, return requirements, and proof photo process.
A vehicle wrap can do a lot for a fleet. It can turn a plain vehicle into a moving brand asset, support a rebrand, promote a campaign, or make a national fleet look more consistent.
However, a wrap does not fix every problem.
In fact, sometimes the smartest move is to wait, repair the surface, choose a different type of graphic, or skip the wrap altogether. That may sound counterintuitive coming from a fleet graphics provider, but it matters. A bad wrap decision can create adhesion issues, removal problems, mismatched branding, unnecessary cost, and avoidable downtime.
So, can you wrap a car with bad paint? Sometimes. But if the paint is peeling, rusting, lifting, or already failing, the wrap may not perform the way you expect.
For fleet managers and brand owners, the real question is not just whether a vehicle can be wrapped. The better question is whether it should be wrapped.
Can You Wrap a Car With Bad Paint?
You may be able to wrap a vehicle with minor paint imperfections. However, damaged paint can create problems before, during, and after installation.
A wrap needs a stable surface. If the paint has rust, peeling clear coat, flaking paint, deep scratches, or poor previous repairs, the vinyl may not adhere correctly. In addition, the wrap can highlight surface defects instead of hiding them.
Then, when the time comes to remove the wrap, weak paint may lift with the vinyl. That does not mean wraps always damage paint. Properly installed and removed wraps often perform well on healthy factory paint. However, pre-existing paint problems can raise the risk of damage during removal.
That is why fleet teams should inspect the vehicle before they approve graphics.
1. Don’t Wrap Over Peeling Paint, Rust, or Failing Clear Coat
First, look closely at the surface.
If the vehicle has peeling paint, rust, bubbling, flaking clear coat, or poorly repaired panels, a full wrap may create more problems than it solves. The graphics may not bond well to the surface. Also, the finished wrap may show bumps, texture, or uneven areas underneath.
Most importantly, removal can become risky. If the paint already lacks a strong bond to the vehicle, the vinyl may pull loose paint with it later.
So before wrapping, repair the surface. If the vehicle does not justify that investment, consider spot graphics, temporary graphics, or no graphics at all.
2. Think Twice Before Wrapping a Vehicle Near Retirement
Next, consider the vehicle’s remaining service life.
If the vehicle will leave the fleet soon, a full wrap may not make financial sense. The cost, production time, installation window, and removal plan may outweigh the benefit.
This comes up often with older fleet assets. A vehicle may still run, but it may not stay in service long enough to justify a full graphics package. In that case, fleet managers should ask:
How long will this vehicle stay in service?
Will the company sell, return, or retire it soon?
Will the wrap need removal before resale?
Would a partial graphic or decal set accomplish enough?
Would temporary graphics make more sense?
A full wrap works best when the asset has enough remaining life to earn the investment.
3. Check Lease Restrictions Before You Wrap
Leased vehicles create a different kind of risk.
Before you add graphics, review the lease terms. Some leases restrict permanent changes, adhesive graphics, full wraps, or anything that could affect the return condition. Others allow graphics but require clean removal before the vehicle goes back.
Because of that, fleet managers should confirm the rules before installation, not after.
If the lease limits permanent graphics, removable or temporary vehicle graphics may work better. 3M specifically discusses temporary wraps and changeable graphics for leased fleet vehicles, seasonal needs, rentals, and short-term applications.
4. Don’t Ignore Sensors, Cameras, and Vehicle Technology
Modern vehicles are not blank canvases.
Many fleet vehicles include cameras, proximity sensors, radar, charging ports, backup cameras, sliding doors, liftgates, vents, handles, lights, and safety systems. Those features can affect where graphics should go and how installers need to work around the vehicle.
Before approving a wrap, confirm that the design does not cover anything critical. That may include:
Cameras
Sensors
Radar areas
Reflectors
Lights
Door handles
Fuel doors
Charging ports
Required safety markings
Vehicle identification numbers
DOT or compliance markings
In addition, some advanced driver assistance systems rely on sensors, cameras, radar, and other vehicle technologies to support safety features. NHTSA describes these systems as using technologies such as cameras, sensors, and radar to help drivers avoid crashes.
So, graphics planning should respect the vehicle’s function, not just the design.
5. Avoid a Full Wrap When the Schedule Is Too Tight
Sometimes the vehicle itself is fine, but the schedule creates the problem.
A quality wrap needs the right conditions. The vehicle may need cleaning, surface prep, old graphics removal, repair time, installation time, and sometimes paint cure time if body work just happened.
If the vehicle only has a tiny service window, rushing the job can lead to mistakes. Installers may not have enough time to prep the surface, work around complex areas, or document the finished vehicle properly.
Instead, choose a graphics option that fits the actual window. For example, spot graphics, door decals, temporary graphics, or a phased rollout may work better than forcing a full wrap into a short window.
6. Use Temporary Graphics for Short-Term Campaigns
Not every branding need deserves a permanent wrap.
If the vehicle supports a seasonal campaign, temporary route, event, pilot program, or short-term promotion, temporary graphics may make more sense. They can give the vehicle a branded presence without locking the asset into a long-term design.
This also helps when the company does not own the vehicle. Rental vehicles, leased assets, overflow fleet units, and seasonal vehicles often need flexible branding that can come off later.
So before choosing a full wrap, ask how long the message needs to last. If the campaign ends in weeks or months, temporary graphics may solve the problem more efficiently.
7. Consider Resale Before You Wrap
A wrap can support the brand while the vehicle works. However, the vehicle may eventually need to leave the fleet cleanly.
If the company plans to sell, trade, return, or auction the vehicle soon, think about removal before installation. Removal takes time and money. Also, older paint or poor surface condition can complicate removal.
For vehicles close to resale, a lighter graphics package may make more sense. Door decals, removable graphics, or partial branding can reduce removal complexity while still keeping the asset professional in the field.
8. Don’t Wrap a Vehicle Without Accurate Vehicle Data
Fleet graphics depend on accurate vehicle information.
A Ford Transit, Ram ProMaster, Chevrolet Express, box truck, trailer, pickup, or service vehicle may each need a different layout. Even within the same model, roof height, wheelbase, windows, body style, racks, liftgates, and upfitting can change the graphics plan.
If the team lacks accurate information, they may print the wrong layout or send installers into the field without the right materials.
Before approving graphics, confirm:
Year, make, and model
VIN or unit number
Vehicle type
Roof height
Wheelbase
Doors and windows
Upfitting or equipment
Existing damage
Current graphics
Install location
Vehicle availability
This step prevents avoidable rework.
9. Don’t Use a Wrap to Hide a Bigger Problem
A wrap can improve how a vehicle looks, but it should not cover up a problem the fleet needs to address.
If a vehicle has body damage, rust, peeling paint, panel issues, or safety concerns, handle those issues first. Otherwise, the wrap may fail early or make future repairs more complicated.
This matters for brand owners too. A wrapped vehicle still reflects the company. If the asset looks damaged underneath the graphics, the brand does not look stronger. It looks neglected.
Better Options When a Full Wrap Does Not Make Sense
If a full wrap does not fit the vehicle, the timeline, or the ownership situation, you still have options.
Depending on the situation, fleet teams can consider:
Spot graphics
Door decals
Partial wraps
Removable graphics
Temporary campaign graphics
Reflective markings
Replacement decals
Graphics removal and reinstallation after repair
Holding the vehicle until surface issues get fixed
Skipping low-value assets close to retirement
The right choice depends on the vehicle’s condition, service life, brand visibility, ownership status, and timeline.
How Signature Helps Decide When Not to Wrap a Vehicle
Signature Graphics helps fleet managers and brand teams make practical graphics decisions before production starts.
That means looking at the vehicle, the surface condition, the brand goal, the service window, the ownership status, and the expected life of the asset. Then, instead of forcing every vehicle into the same solution, Signature helps teams choose the approach that fits the actual fleet.
Sometimes that means a full wrap. Sometimes it means a partial wrap, temporary graphic, repair-first approach, or no wrap at all.
The goal is simple: protect the brand, avoid unnecessary rework, and make sure the graphics choice matches the vehicle.
FAQs About When Not to Wrap a Vehicle
Can you wrap a car with bad paint?
Sometimes, but bad paint increases risk. Peeling paint, rust, failing clear coat, and poor repairs can affect adhesion and removal. A stable, clean, healthy surface gives the wrap a much better chance of performing well.
Will a vehicle wrap damage paint?
A properly installed and removed wrap usually works best on healthy paint. However, weak paint, poor previous repairs, peeling clear coat, rust, or improper removal can increase the chance of paint damage.
Can you wrap over scratches or dents?
You can wrap over some minor scratches, but the wrap may not hide them. Deep scratches, dents, rust, and uneven surfaces can show through the vinyl and affect the finished look.
Should you wrap an old fleet vehicle?
It depends on the vehicle’s remaining service life, condition, visibility, and resale plan. If the vehicle will retire soon, a full wrap may not justify the cost or downtime.
Can you wrap a leased vehicle?
Possibly, but you should check the lease terms first. Some leases restrict graphics or require clean removal before return. Temporary or removable graphics may work better for leased vehicles.
Are temporary graphics better for short-term campaigns?
Often, yes. Temporary graphics can support seasonal campaigns, rentals, events, pilot programs, and short-term routes without committing the vehicle to a permanent wrap.
Not every company owns every vehicle it puts on the road.
Some fleets include leased vans. Others use rented vehicles for seasonal demand, special events, regional launches, acquisitions, overflow capacity, or short-term campaigns. As a result, brand teams and fleet managers often face the same problem: the vehicle needs to look branded, but the graphics cannot stay there forever.
That is where temporary vehicle graphics can help.
Instead of treating every fleet asset like a permanent wrap project, companies can use removable or changeable graphics to support short-term needs. They can brand a leased vehicle, promote a campaign, cover a seasonal route, or create consistency across a mixed fleet without committing to a permanent graphics solution.
However, temporary does not mean careless. The graphics still need to look professional, stay in place, come off cleanly, and protect the brand while the vehicle is in use.
Why Vehicle Graphics Matter for Modern Fleets
Fleet ownership has changed.
Many companies no longer rely only on vehicles they own outright. Instead, they may lease vehicles, rent units during busy seasons, use temporary assets after an acquisition, or add vehicles quickly when demand spikes.
That flexibility helps operations move faster. However, it also creates a branding problem.
A rented white van, an unmarked leased box truck, or a mismatched temporary vehicle can weaken the brand experience. Customers may not recognize the company. Drivers may arrive in vehicles that look unfinished. Local teams may improvise with magnets, decals, or inconsistent graphics.
Temporary vehicle graphics give companies a way to solve that problem without overcommitting.
When Temporary Graphics Make Sense
Temporary graphics work best when the vehicle has a limited purpose, limited ownership window, or limited branding need.
For example, companies may use temporary vehicle graphics for:
Leased fleet vehicles
Rental vans or trucks
Seasonal delivery demand
Short-term service routes
Event vehicles
Pilot programs
Regional launches
Temporary acquisitions
Franchise or branch transitions
Campaign-specific promotions
Vehicles waiting for a permanent rebrand
Overflow units during peak demand
In each case, the company needs the vehicle to look credible and brand-right while it is on the road. At the same time, the company may need to remove the graphics later without damaging the vehicle or violating lease terms.
Temporary vs. Permanent Wraps
Permanent fleet graphics work well when the company owns the vehicle, plans to keep it in service, and wants long-term brand consistency.
Temporary vehicle graphics solve a different problem.
They help companies brand vehicles when the timeline, ownership, or business purpose may change. For that reason, they usually focus on flexibility, clean removal, and efficient installation.
A permanent wrap may make sense for a core fleet vehicle that will represent the brand for years. However, a temporary graphic may work better for a leased van, rental truck, seasonal route, or short-term campaign.
The right choice depends on how long the vehicle will stay in service, who owns it, what the lease allows, and how visible the vehicle will be to customers.
Temporary Wraps for Leased Vehicles
Leased vehicles create one of the most common use cases for temporary graphics.
A company may need the vehicle to represent the brand every day, but the lease may restrict permanent changes. Before adding graphics, fleet managers should review the lease agreement and confirm what types of non-permanent branding the lessor allows.
In many cases, removable vehicle graphics can give companies a practical option. 3M specifically notes that temporary graphic wraps can help companies brand leased trucks and vans with removable wrap films.
Even so, teams should not assume every leased vehicle works the same way. Before installation, they should confirm the lease terms, vehicle condition, paint quality, material choice, removal plan, and return requirements.
Graphics for Rental Vehicles
Rental vehicles create another challenge.
A company may need extra capacity for a few days, weeks, or months. However, a rental vehicle often arrives with no branding at all. That can create problems when drivers visit customer sites, make deliveries, or support a public event.
Temporary vehicle graphics can help rental assets look more professional and consistent with the rest of the fleet.
Still, rental vehicles require extra care. Companies should confirm whether the rental agreement allows graphics. They should also choose materials designed for short-term use and plan removal before the vehicle returns.
The goal is simple: make the rental vehicle support the brand while it works, then return it cleanly when the job ends.
Promotional Wraps for Seasonal Campaigns
Seasonal demand often forces companies to add vehicles quickly.
Retail, food service, delivery, logistics, home services, healthcare, utilities, and event-driven businesses may need more vehicles during peak periods. However, those vehicles may not stay in the fleet long enough to justify permanent graphics.
In that case, temporary vehicle graphics can support the season without creating long-term commitments.
For example, a company may use short-term graphics for a holiday campaign, summer service push, product launch, local event, or limited-time offer. 3M describes changeable graphic films as a flexible option for short-term needs, including seasonal campaigns and rentals.
That flexibility matters because the campaign can end, the graphics can come off, and the base vehicle can move on to its next use.
What to Consider Before Using Temporary Vehicle Graphics
Temporary graphics still need planning.
Before installation, fleet managers and brand teams should answer a few practical questions:
Who owns the vehicle?
What does the lease or rental agreement allow?
How long will the graphics stay on the vehicle?
What condition is the paint in?
Does the vehicle need cleaning, repair, or prep first?
Will the graphics need to withstand weather, washing, or road grime?
Who will remove the graphics?
Where will removal happen?
What proof does the company need before and after installation?
Does the design need to match permanent fleet graphics?
These questions prevent temporary branding from becoming a permanent headache.
Why Material Choice Matters for Temporary Vehicle Graphics
Material choice matters because temporary graphics need to do two things well: stay on the vehicle during use and come off when the job ends.
A short-term graphic still has to handle road conditions, washing, sun exposure, weather, and daily use. At the same time, the material should support clean removal based on the vehicle surface, timing, and application.
That is why companies should not treat temporary graphics like basic stickers. The material, adhesive, laminate, surface prep, and removal plan all affect the final result.
If the team chooses the wrong material, the graphics may fail early, leave residue, damage the surface, or take too long to remove.
Temporary Vehicle Graphics Still Need Brand Standards
Temporary should not mean inconsistent.
Even when graphics stay on a vehicle for a short time, they still represent the company in the field. Customers do not know whether a van is leased, rented, temporary, or permanent. They only see the brand.
Because of that, temporary vehicle graphics should still follow brand standards.
That includes logo placement, colors, message hierarchy, phone numbers, URLs, safety markings, and any regional or compliance requirements. If the temporary vehicle works beside permanent fleet vehicles, the design should feel intentional, not improvised.
Temporary Vehicle Graphics Can Help During Rebrands and Acquisitions
Temporary graphics can also help during messy transition periods.
After a merger, acquisition, or rebrand, companies may not have every vehicle ready for a permanent update. Some vehicles may retire soon. Others may belong to a lease program. Some may need body work before graphics installation. Others may operate in markets that need a faster brand change.
In those situations, temporary vehicle graphics can bridge the gap.
They can cover old marks, introduce the new brand, or create a more consistent fleet appearance while the company works through the larger rollout.
That does not replace a full rebrand plan. However, it can reduce confusion while the permanent program catches up.
Temporary Vehicle Graphics Need a Removal Plan
Many companies plan the installation but forget the removal.
That creates problems later.
Before temporary graphics go on the vehicle, the team should know when they need to come off, who will remove them, where removal will happen, and how the vehicle should look afterward.
This matters most for leased and rented vehicles. If the vehicle has to return in a certain condition, removal becomes part of the project, not an afterthought.
A strong temporary graphics plan includes:
Installation date
Expected removal date
Material used
Vehicle condition before install
Proof photos after install
Removal location
Removal responsibility
Final condition photos
That record helps protect the brand, the vehicle, and the team managing the asset.
How Signature Helps With Temporary Vehicle Graphics
Signature Graphics helps brands and fleet teams manage temporary vehicle graphics when ownership, timing, or vehicle use does not fit a permanent wrap.
That may include leased vehicles, rental assets, short-term campaigns, seasonal fleet needs, acquisition transitions, or vehicles waiting for a larger rebrand rollout.
Signature helps teams plan the graphics, match the brand standards, coordinate installation, document completion, and think through removal from the beginning.
The goal is simple: make temporary vehicles look intentional while they represent the brand, then keep the process organized when those graphics need to change or come off.
FAQs About Temporary Vehicle Graphics
What are temporary vehicle graphics?
Temporary vehicle graphics are removable or changeable graphics designed for short-term use on cars, vans, trucks, trailers, or other fleet assets. Companies often use them for leased vehicles, rental assets, seasonal campaigns, events, or short-term branding needs.
Can you put temporary vehicle graphics on a leased vehicle?
Often, yes, but the fleet manager should check the lease agreement first. The company should confirm what the lessor allows, choose the right removable material, and plan removal before the vehicle returns.
Can you brand a rental vehicle?
Sometimes. It depends on the rental agreement and the graphics material. Companies should confirm approval before installation and choose graphics that support clean removal.
How long do temporary vehicle graphics last?
The timeline depends on the material, vehicle surface, weather exposure, cleaning, and campaign length. Some temporary or changeable films can support short-term use, while others may last longer depending on the application. 3M notes that some changeable graphic films can have expected performance life up to two years, though companies often use them for shorter periods.
Do temporary vehicle graphics damage paint?
The right material and proper installation/removal process can reduce risk. However, paint condition matters. Older paint, poor repairs, rust, peeling clear coat, or previous damage can increase the chance of problems during removal.
Are temporary vehicle graphics better than magnets?
It depends on the vehicle, timeline, brand standards, and use case. Magnets may work for very simple short-term needs, but removable graphics usually look more integrated and professional when the vehicle needs to represent the brand consistently.
Branding a new vehicle before it enters service is one thing. Planning vehicle wrap installation for a vehicle that already works every day is something else entirely.
Once a fleet is active, every vehicle has a job to do. It may run routes, visit customers, carry equipment, make deliveries, or support field teams. So when the time comes for vehicle wrap installation, fleet managers cannot just pull vehicles off the road whenever it is convenient for the graphics team.
They need a plan that works around the business.
That is where fleet graphics programs often get harder than expected. Vehicles may be dirty, damaged, scattered across markets, booked into service schedules, or only available at night. Meanwhile, the brand team still needs the graphics to look right, match standards, and show up consistently across the fleet.
Good installation coordination closes that gap.
Why Vehicle Wrap Installation Gets Harder Once Vehicles Are in Service
A parked vehicle gives installers time, access, and control. An active fleet does not.
Once vehicles enter service, the installation plan has to work around drivers, routes, maintenance schedules, branch locations, customer commitments, and vehicle availability. As a result, the graphics rollout becomes more than a production job. It becomes an operations job.
That matters because downtime has real consequences. Fleet graphics providers and industry sources often point to vehicle downtime as one of the biggest concerns in fleet graphics programs, since every hour off the road can affect revenue and operations.
So the question is not just, “Can we install the graphics?”
The better question is, “Can we install the graphics without creating problems for the fleet?”
The First Challenge: Vehicles Are Not Always Ready for Graphics
Before vehicle wrap installation begins, the vehicle has to be ready for graphics.
That sounds simple, but active fleet vehicles pick up real-world wear quickly. They may arrive with road grime, salt, oil residue, dents, scratches, peeling decals, or old graphics that need removal. In some cases, the vehicle may need body work before new graphics can go on.
If no one catches those issues early, the installation day can fall apart.
For example, a dirty vehicle may need additional cleaning. A damaged panel may need repair before graphics will adhere correctly. Old vinyl may take longer to remove than expected. In addition, a vehicle with fresh paint may need cure time before new graphics can be installed.
That is why pre-install inspection matters. Fleet prep guidance commonly recommends inspecting vehicles before installation day and looking for surface damage or imperfections before the wrap process begins.
Vehicle Wrap Installation Needs Accurate Vehicle Information
Next, the installation team needs accurate vehicle data.
For an active fleet, “van” is not enough information. A Ford Transit, Ram ProMaster, Chevrolet Express, box truck, trailer, pickup, or service vehicle may each need a different layout. Even vehicles in the same category can have different wheelbases, roof heights, door configurations, windows, handles, sensors, racks, liftgates, or aftermarket equipment.
Because of that, fleet managers should confirm:
Vehicle make, model, and year
Unit number or asset ID
VIN
Location
Body style
Roof height and wheelbase
Existing graphics
Damage or repair needs
Upfitting or equipment that affects placement
Availability window
Without that information, teams may print the wrong layout, schedule the wrong installer, or discover problems only after the vehicle arrives.
Why Fleet Graphics Installation Becomes a Scheduling Problem
For large fleets, scheduling creates one of the biggest challenges.
Vehicles may operate in different cities, regions, or branches. Some may only return to the yard after hours. Others may run daily routes and cannot sit idle during business hours. In some cases, installers need to work overnight, on weekends, or in waves by market.
That means vehicle wrap installation has to fit the fleet’s operating rhythm.
A good schedule answers practical questions upfront:
When can each vehicle come out of service?
Where will the installation happen?
Who controls vehicle access?
Who confirms the vehicle is clean and ready?
What happens if a vehicle misses its appointment?
Can installers complete the work at night?
Does the vehicle need removal, repair, or prep first?
Who approves the finished installation?
Without that coordination, vehicles get missed, drivers show up late, installers wait, and rollout timelines start to slip.
How Long Does Vehicle Wrap Installation Take?
The answer depends on the vehicle, the graphics coverage, and the condition of the asset.
A spot graphic may take only a few hours. A partial wrap may take longer. A full wrap can require much more time, especially if the vehicle needs cleaning, old vinyl removal, or surface prep. One recent fleet wrap timing guide notes that full wraps can require multi-day shop commitments per vehicle, while partial wraps and spot graphics may take less time depending on scope.
However, timing becomes harder to predict when vehicles are already working.
A clean vehicle with approved artwork and a confirmed installation window can move quickly. A dirty vehicle with damage, missing records, or schedule conflicts can slow everything down.
So instead of planning around the best-case scenario, fleet managers should plan around the real condition of the fleet.
Vehicle Wrap Installation Across Multiple Locations Needs One Standard
When a fleet spans multiple markets, consistency becomes harder to protect.
Different locations may use different installers. Local teams may interpret instructions differently. Vehicles may arrive in different condition. Some branches may follow the schedule closely, while others may need more coordination.
That can lead to inconsistent results.
One market may place graphics correctly. Another may miss a decal. A third may install the right artwork but skip required proof photos. Over time, the fleet starts to look close, but not quite consistent.
To prevent that, fleet graphics installation should follow one clear standard. That standard should define artwork, materials, placement, install expectations, photo proof, issue reporting, and final approval.
Then every market works from the same playbook.
Why Active Fleet Installations Need Proof Photos
Proof photos matter because they confirm that the work actually happened and that the vehicle matches the approved layout.
For active fleets, that visibility matters even more. Vehicles may leave the installation site and go straight back to work. If no one captures final photos, the brand team may not know whether the installation was completed correctly.
At minimum, proof photos should show:
Driver side
Passenger side
Front
Rear
Unit number
Any required DOT or compliance markings
Close-ups of important brand details
Any exceptions or damage
These photos give fleet, operations, and brand teams a shared record. They also help later if the vehicle needs repair, replacement graphics, removal, or rebranding.
How to Prepare Active Vehicles for Vehicle Wrap Installation
Fleet managers can make the process smoother by preparing vehicles before installation day.
Start by confirming which vehicles need graphics and where they are located. Then check each vehicle’s condition, schedule access, and confirm who will release the vehicle to the installer.
Before installation, teams should also:
Clean the vehicle
Remove personal items or equipment that blocks access
Report visible damage
Confirm old graphics or decals that need removal
Check whether body work needs to happen first
Confirm the approved artwork version
Make sure the driver or branch knows the schedule
Build in time for missed appointments or delays
This work may feel basic, but it prevents most of the avoidable problems that slow down fleet installations.
What Goes Wrong Without Installation Coordination
Without strong coordination, active fleet branding gets messy quickly.
Vehicles may show up dirty. Drivers may not know they need to report to the install site. Installers may not have access to the right vehicle. A branch may send the wrong asset. Old graphics may take longer to remove than expected. Damage may stop the installation. Proof photos may never get captured.
Then the rollout becomes reactive.
Instead of moving through a clean schedule, teams start chasing updates, rescheduling missed vehicles, fixing inconsistencies, and trying to figure out what actually happened.
That is when a graphics program starts to drain time from fleet, operations, marketing, and procurement.
Why Vehicle Wrap Installation Is Really an Operations Issue
Fleet branding may start with marketing, but installation touches operations.
The brand team cares about consistency. Fleet cares about downtime. Drivers care about availability. Procurement cares about cost. Local managers care about schedules. The graphics provider needs access, clean surfaces, approved artwork, and clear instructions.
Because of that, the best fleet graphics programs do not treat installation as an afterthought. They plan it as part of the operation.
That means coordinating people, vehicles, locations, timing, materials, artwork, proof, and exceptions from the beginning.
How Signature Helps With Vehicle Wrap Installation for Active Fleets
Signature Graphics helps brands and fleet teams manage the practical side of vehicle wrap installation when vehicles are already in service.
That includes coordinating schedules, adapting graphics across vehicle types, managing installation details, tracking progress, and documenting completed work. When vehicles operate across multiple locations or need after-hours installation, that coordination becomes even more important.
The goal is simple: keep the rollout moving, protect brand consistency, and help the fleet get back on the road with less confusion.
FAQs About Vehicle Wrap Installation for Active Fleets
How do you schedule vehicle wrap installation for a working fleet?
Start by identifying where each vehicle is located, when it can come out of service, and who controls access. Then schedule installation around routes, maintenance windows, branch operations, and driver availability.
Can vehicle wrap installation happen at night?
Yes, in many cases, installers can complete work after hours if the location, lighting, vehicle access, and schedule support it. Night or weekend installation can help reduce downtime for active fleets.
Do vehicles need to be cleaned before wrap installation?
Yes. Vehicles should arrive clean and ready for installation. Dirt, road grime, wax, oil, salt, or residue can interfere with adhesion and slow down the process.
Can damaged vehicles still get graphics installed?
Sometimes, but the damage matters. Dents, scratches, rust, peeling paint, fresh paint, or damaged panels may need repair before graphics can be installed correctly.
What causes fleet graphics installation delays?
Common delays include dirty vehicles, missed appointments, damaged panels, old graphics removal, wrong vehicle information, unavailable drivers, weather, material issues, and lack of proof or approval.
Why does installation coordination matter for fleet graphics?
Installation coordination keeps vehicles, installers, artwork, materials, schedules, and proof photos aligned. Without it, teams lose time, miss vehicles, and risk inconsistent branding.
When companies go through rebranding after merger or acquisition, the brand conversation usually starts in the boardroom.
What name will we use? Which logo stays? What changes for customers? How do we explain the new company to the market?
Those questions matter. However, once the strategy is approved, the real work begins. The new brand has to show up everywhere people see the company. That includes websites, sales materials, uniforms, buildings, signage, offices, and one of the most visible assets in the business: the fleet.
For companies with vehicles on the road, rebranding after a merger can get complicated fast. A fleet may include different vehicle types, old logos, local phone numbers, outdated graphics, acquired assets, regional vendors, missing records, and vehicles spread across multiple markets.
If no one plans for that early, the fleet can become one of the most visible places where the rebrand falls apart.
Why Rebranding After Merger Gets Complicated for Fleet Branding
A merger or acquisition rarely creates a clean starting point.
Instead, it usually brings together different companies, different operating habits, and different brand systems. One company may have newer graphics. Another may have older decals that local teams ordered years ago. Some vehicles may follow brand standards closely. Others may carry branch-specific messages, phone numbers, service lists, or legacy marks.
As a result, the fleet becomes a moving inventory of brand history.
That creates a real challenge for brand owners, fleet managers, operations teams, and private equity-backed companies. Everyone wants the market to see one stronger company, but the assets on the road may still tell a different story.
Why Rebranding After Merger Starts With Unknown Fleet Assets
Most fleet rebranding problems start with a simple issue: the company does not know exactly what it has.
After an acquisition, the fleet list may not match reality. Some vehicles may sit at branch locations. Others may work in the field every day. Some may have changed assignments, moved markets, or gone through repairs without anyone updating the records.
Before a company can rebrand the fleet, it needs to answer basic questions:
How many vehicles need new graphics?
Where are they located?
What type of vehicles are they?
What graphics are currently on them?
Which vehicles should be updated first?
Which vehicles will leave the fleet soon?
Which assets need removal, replacement, or temporary branding?
Without that information, teams start making assumptions. Then timelines slip, budgets change, and vehicles keep showing up in the market with the wrong brand.
Mixed Fleets Create Mixed Brand Impressions
Acquisitions often create mixed fleets.
One company may operate vans. Another may use box trucks, trailers, pickups, service vehicles, specialty equipment, or leased assets. Some vehicles may have full wraps. Others may only have decals, magnets, reflective markings, or door graphics.
That mix makes rebranding harder because one design rarely works across every asset.
A layout that looks good on a box truck may not fit a service van. A logo that works on a flat trailer may not work across windows, handles, door seams, sensors, fuel doors, or body curves. In addition, older vehicles may have damage, faded paint, or existing graphics that need removal before new branding can go on.
So, even if the new brand standards look clean in a presentation, the fleet still needs practical adaptation.
Old Brand Marks Stay Visible Longer Than People Expect
During a merger or acquisition, companies often underestimate how long old branding can stay in the field.
A vehicle may miss the first rollout window. A branch may delay installation because it needs the vehicle for daily work. A local vendor may only update part of the graphics. A damaged vehicle may sit at a body shop. A leased unit may need a different approach.
Meanwhile, customers keep seeing the old brand.
That creates confusion. It can make the acquisition look incomplete, especially when customers see old logos in one market and new graphics in another. For private equity-backed companies building a stronger platform brand, that inconsistency can weaken the message they are trying to send.
Local Vendors Can Create Inconsistent Results
After an acquisition, local teams may already have their own vendor relationships. That can help with speed, but it can also create consistency problems.
One vendor may use different materials. Another may interpret the artwork differently. A third may install the graphics without the same proofing process. Over time, the fleet starts to look close enough in some places and noticeably different in others.
That is where brand control breaks down.
A national rebrand needs clear standards for materials, color, placement, installation, proof photos, and repair. Otherwise, local execution can turn one approved brand into several slightly different versions.
Outdated Specs Slow Everything Down
A rebrand after a merger also exposes old or incomplete specifications.
Teams may not have current vehicle templates. They may not know which material was used on older graphics. They may not have production files for acquired vehicles. They may not know which assets need reflective markings, DOT numbers, unit numbers, or local compliance decals.
As a result, people waste time hunting for files, recreating layouts, checking measurements, or correcting mistakes after installation.
That slows down the rollout and increases the risk of rework.
Timelines Get Messy When Vehicles Stay in Service
Fleet rebranding does not happen in a vacuum. Vehicles still need to work.
That means every installation competes with routes, service calls, delivery schedules, driver availability, maintenance windows, and regional operations. In some cases, the best installation window may happen at night, over a weekend, or during scheduled downtime.
So, the rollout plan has to respect the operation.
If the plan only focuses on the brand launch date, it may miss the practical question that matters most to fleet teams: when can we actually get the vehicle?
How to Keep Fleet Rebranding From Failing
A successful fleet rebrand after a merger starts with visibility.
Before teams order graphics or schedule installations, they need a clear view of the fleet. That means building an asset list, confirming vehicle types, documenting current graphics, prioritizing markets, and deciding which vehicles need immediate updates.
From there, the company can build a more realistic rollout plan.
1. Start With a Fleet Audit
First, identify every branded asset that may need attention.
That includes:
Vans
Box trucks
Trailers
Pickups
Service vehicles
Specialty vehicles
Leased vehicles
Rental or temporary assets
Equipment with visible branding
Branch-specific vehicles
Then, document where each asset is, what brand it currently carries, and what condition it is in.
A clean fleet audit helps teams avoid one of the most common acquisition mistakes: launching the new brand before they know what needs to change.
2. Prioritize the Vehicles Customers See Most
Next, decide which vehicles matter most to the rollout.
Not every asset carries the same visibility or risk. Some vehicles operate in high-density markets. Others visit customer sites every day. Some represent the acquired brand in markets where the new company wants to make a strong impression quickly.
Prioritize vehicles based on visibility, customer impact, geography, and business need.
That way, the rollout does not treat every asset the same when some vehicles matter more to the brand story.
3. Create Clear Graphics Standards
Once the team understands the fleet, create clear graphics standards.
Those standards should include:
Logo placement
Color specifications
Material requirements
Reflective graphic requirements
Unit number placement
DOT or compliance markings
Vehicle-specific layouts
Installation standards
Proof photo requirements
Repair and replacement process
This gives internal teams, vendors, installers, and local branches the same playbook.
4. Plan Around Operations
Then, build the rollout around how the fleet actually works.
Ask practical questions early:
When can vehicles come out of service?
Can installation happen overnight?
Which markets need mobile installation?
Which assets need body repair or graphics removal first?
Which vehicles will retire soon?
Which leased vehicles need temporary or removable graphics?
Who approves completed work?
This step matters because missed installation windows can derail the schedule quickly.
5. Track the Rollout in One Place
Finally, track the rebrand from one central source of truth.
A spreadsheet may work for a small fleet, but it can fall apart when the company has hundreds or thousands of vehicles across multiple markets.
Teams need to know which vehicles are planned, scheduled, in progress, completed, delayed, damaged, or missing information. They also need proof that each vehicle received the right graphics.
Without that visibility, the rollout becomes a series of emails, photo folders, local updates, and status calls.
Why This Matters for Private Equity-Backed Companies
Private equity-backed companies often use acquisitions to build scale. However, the market still needs to see that scale clearly.
For that reason, a fleet rebrand can help communicate that the company is bigger, more unified, and more capable than before. But when vehicles keep showing different names, different logos, and different messages, the market gets a mixed signal.
That matters to customers. It also matters to employees. And over time, it can affect future acquisitions because brand consistency helps the platform feel organized, disciplined, and ready to grow.
In other words, fleet branding is not just a design task. It is part of post-acquisition integration.
How Signature Helps With Rebranding After Merger Fleet Rollouts
Signature Graphics helps companies manage fleet rebrands when the work moves from strategy to execution.
That means helping teams identify what is on the road, adapt designs across vehicle types, produce consistent graphics, coordinate installation, and document completed work.
For companies going through a merger or acquisition, that kind of support matters. The brand may change in one meeting, but the fleet changes one asset at a time.
The goal is simple: help the new brand show up correctly, consistently, and visibly across every vehicle that represents the company.
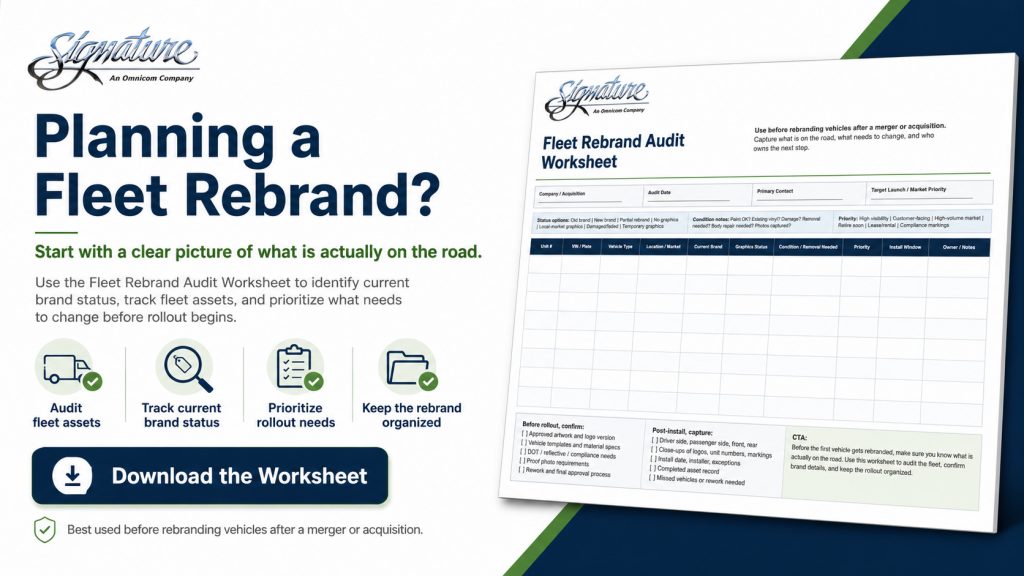
Use the Fleet Rebrand Audit Worksheet to identify what you have, what needs to change, and which vehicles should move first.
Prompt to download the Fleet Rebrand Audit Worksheet.
FAQs About Fleet Rebranding After Merger
What is fleet rebranding?
Fleet rebranding means updating vehicle graphics, decals, wraps, markings, and related brand elements after a company changes its name, logo, ownership, or brand identity.
Why does fleet rebranding get harder after an acquisition?
Fleet rebranding gets harder after an acquisition because the company may inherit unknown assets, old graphics, inconsistent records, local vendors, mixed vehicle types, and different brand standards.
What should companies do before rebranding acquired fleet vehicles?
Companies should start with a fleet audit. They need to identify each vehicle, confirm its location, document its current graphics, check its condition, and decide whether it needs removal, replacement, temporary branding, or a full graphics update.
How Long Does Rebranding After Merger Take for Fleet Vehicles?
The timeline depends on the fleet size, vehicle locations, graphics complexity, installation access, material availability, and operational schedules. A small regional fleet may move quickly, while a national fleet may need a phased rollout.
Who should manage fleet branding during an acquisition?
Fleet branding usually needs input from marketing, fleet, operations, procurement, finance, and local branch teams. However, one central team should own the process so vendors, installers, and internal stakeholders work from the same plan.
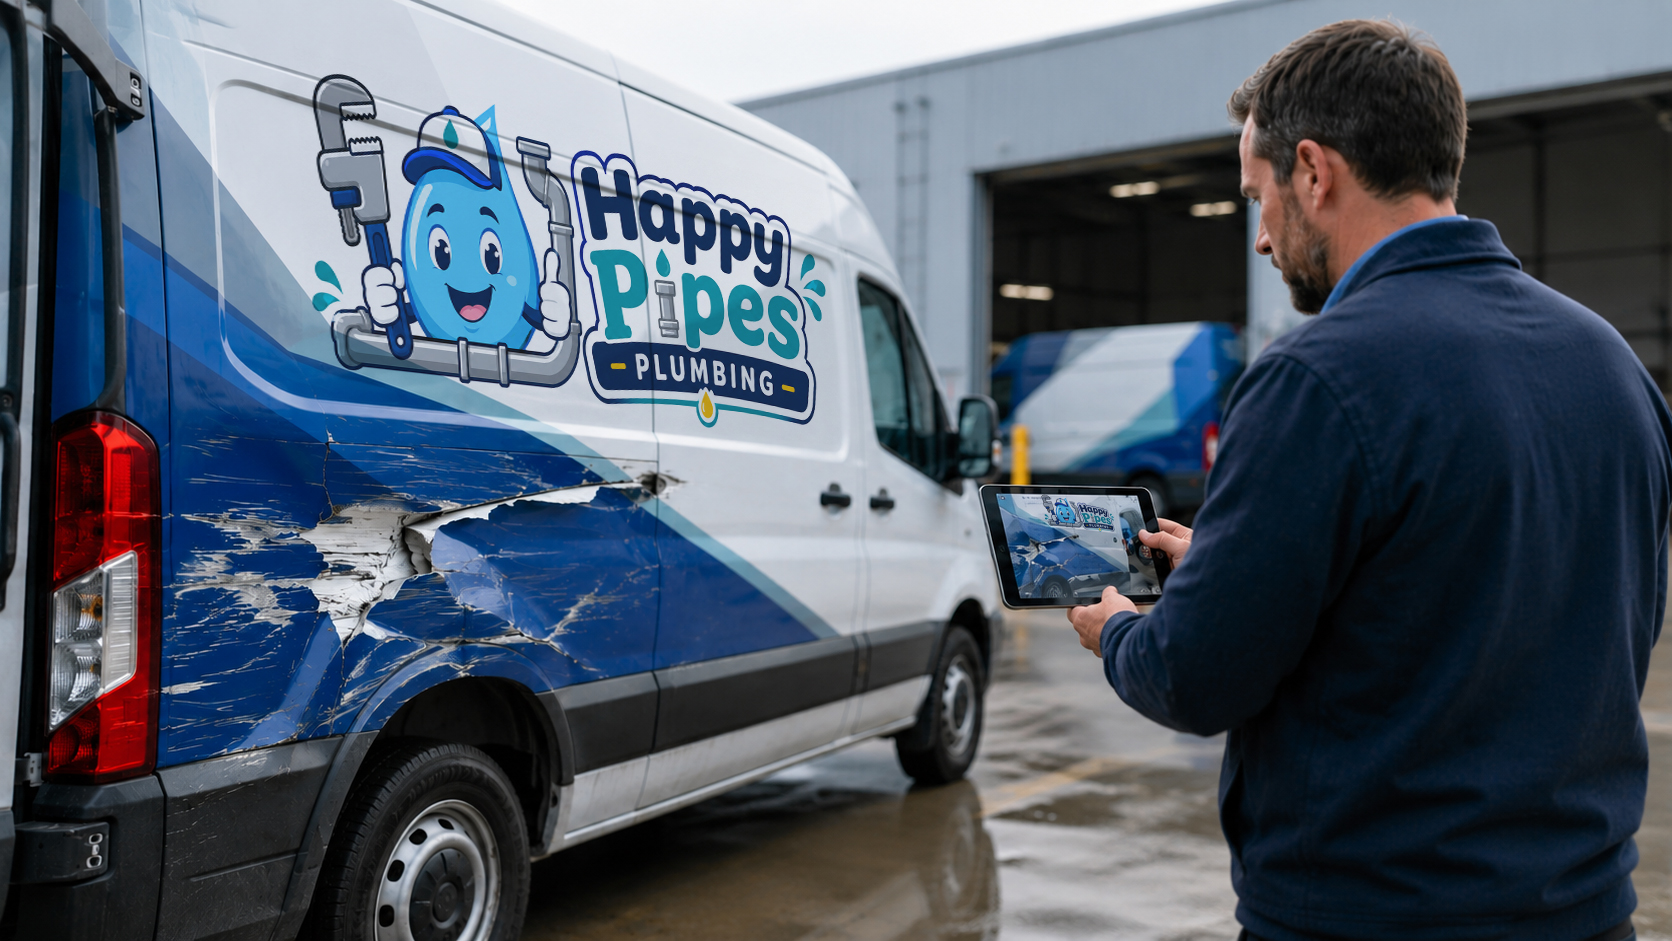
When a branded fleet vehicle gets damaged, the first priority is clear: repair the vehicle, handle any needed vehicle wrap repair, and get it back on the road.
From there, the practical questions usually come next. How bad is the damage? How long will the vehicle be out of service? What does insurance need?
However, if that vehicle carries graphics, decals, reflective markings, or a full wrap, the repair involves more than the vehicle itself. The brand needs attention too.
A collision, scrape, panel replacement, or body shop repair can leave a branded vehicle looking mismatched or unfinished. So for fleet managers and brand owners, the job is not just to fix the vehicle. They also need to make sure the brand looks right when the repair is complete.
That is where good documentation comes in.
What Is Vehicle Wrap Repair?
Vehicle wrap repair means replacing, repairing, or reinstalling graphics after damage affects part of a wrapped or branded vehicle.
Depending on the damage, that may include:
Replacing graphics on a repaired door, hood, bumper, or side panel
Matching new vinyl to the graphics already on the vehicle
Reprinting damaged decals or lettering
Reapplying DOT numbers, reflective graphics, or compliance markings
Removing damaged wrap material before body work begins
Reinstalling graphics after paint or collision repair
Confirming the finished vehicle still matches brand standards
On one vehicle, that may sound simple. However, for a national fleet, the process can get complicated fast.
For example, different vehicles may carry different graphic versions. Some may still use older brand standards. Others may include local phone numbers, unit numbers, safety markings, or campaign-specific graphics.
Because of that, good records matter. Without them, what should be a straightforward repair can quickly turn into guesswork.
Why Documentation Matters After Fleet Vehicle Damage
After an accident, teams often focus on the vehicle first and the graphics second. The vehicle goes to the body shop, the shop repairs or replaces panels, paint work gets finished, and then someone realizes the branding still needs attention.
That creates problems.
Without clear photos, original artwork, installation records, or vehicle history, teams have a harder time answering basic questions:
What graphics were on the vehicle before the damage?
Which panels did the damage affect?
Did the accident damage the wrap, or did damage happen during repair?
What material did the original installation use?
Was the graphic reflective, laminated, temporary, removable, or permanent?
Did the damaged panel include unit numbers, safety markings, or brand messaging?
Does the repaired vehicle still match the rest of the fleet?
That is why good documentation matters. It keeps fleet, operations, insurance, and brand teams working from the same information. While it does not guarantee claim coverage, since every policy works differently, it does make the repair process much cleaner.
What to Document Before Vehicle Wrap Repair
Before anyone removes, covers, or repairs damaged graphics, fleet managers should capture the vehicle’s condition as clearly as possible.
At minimum, document the following:
Full Vehicle Photos
First, take wide photos of every side of the vehicle, not just the damaged area. These photos show how the graphics fit the full asset and help the repair team confirm what needs replacement.
Capture:
Driver side
Passenger side
Front
Rear
Roof, if graphics are present
Any trailer, cab, or specialty equipment areas
Close-Ups of the Damage
Next, take detailed photos of the damaged panels, scratches, dents, tears, peeling vinyl, lifted edges, or missing graphics.
Also, photograph the damage from multiple angles. A close-up alone does not give the repair team enough context. They need to see exactly where the damage sits on the vehicle and how it relates to doors, seams, panels, bumpers, and body lines.
Unit Number, VIN, and Location
Then, tie every damaged vehicle to a specific asset record.
Document:
VIN
Unit number
License plate
Vehicle make, model, and year
Location or market
Date of damage
Date photos were taken
This step matters because many fleet vehicles look alike. If several white vans or box trucks go through repair at the same time, clear identification helps everyone avoid confusion.
Existing Brand Details
Finally, capture any brand details that could affect reprinting or replacement before vehicle wrap repair begins.
That may include:
Logo placement
Color breaks
Taglines
Service lines
Phone numbers
Website URLs
QR codes
Reflective graphics
DOT numbers
Decal placement
Campaign-specific graphics
These details can disappear quickly once a shop removes or paints the damaged panel. When the graphics team sees them upfront, they can restore the vehicle more accurately.
What Installation Records Should Include
A strong vehicle wrap repair process starts long before an accident happens. It starts with good installation records.
For branded fleets, those records should include:
Approved artwork files
Vehicle templates
Material specifications
Laminate specifications
Install date
Installer or installation location
Proof photos
Asset number or VIN
Any exceptions or field adjustments
Repair or replacement history
These records give the graphics provider a clear starting point when repair work comes up.
Without them, the team may need to recreate the layout from photos, estimate placement, or hunt down old artwork. That slows the repair down and increases the chance of an inconsistent result.
Why Vehicle Wrap Repair Is Not Always a Simple Reprint
A lot of people assume damaged graphics can simply be reprinted and replaced.
Sometimes they can. But not always.
A few things can change how the repair needs to happen:
Vinyl Ages Over Time
Sun, weather, road grime, and washing can change the look of vinyl over time. A newly printed panel may not match the older graphics already on the vehicle.
That matters most on large panels with solid brand colors. Even when the artwork file is right, the existing wrap may have faded enough to make the repair noticeable.
Damage Can Cross Multiple Panels
A scrape may look like it only affects one spot, but the graphic may run across doors, seams, or body lines. If the repair team replaces only one small section, the design may not line up correctly.
Paint and Body Work Can Change the Surface
When a body shop repairs, replaces, or repaints a panel, the surface may need time to cure before new graphics go on. If the graphics are installed too soon, the vinyl may not adhere properly or may fail later.
Different Vehicles Need Different Layouts
Fleet graphics are not one-size-fits-all. A Ford Transit, Ram ProMaster, Chevrolet Express, box truck, trailer, or service van may each need a different layout.
That is why accurate vehicle data matters. It helps the repair team replace the right graphics, in the right place, on the right vehicle.
How Insurance Claims and Graphics Repair Overlap
Insurance claims usually focus on the vehicle damage first. But when the vehicle carries branded graphics, the repair scope may need to include the wrap too.
That is why documentation matters.
When branded graphics are damaged, the repair estimate should account for:
Removing damaged wrap material
Reprinting affected graphics
Reinstalling graphics after body repair
Replacing reflective or safety markings
Matching the repaired area to the approved brand standard
Providing proof photos after completion
Don’t assume the body shop, insurer, graphics provider, and internal brand team all have the same information.
They usually don’t.
Gather the documentation early and confirm the graphics scope before anyone considers the repair complete.
What Can Go Wrong Without Good Documentation
Poor documentation can create avoidable problems after a vehicle accident.
For example:
The wrong graphic version gets reprinted
A repaired vehicle returns to service with missing branding
A local vendor recreates artwork incorrectly
The replacement panel does not match the rest of the fleet
DOT or reflective markings are missed
The brand team cannot confirm the repair was completed correctly
Insurance, fleet, and operations teams disagree about what was damaged
The vehicle is repaired mechanically but still looks unfinished
These issues are frustrating because they usually happen after everyone thinks the problem is solved.
The vehicle may be road-ready, but not brand-ready.
Best Practices for Fleet Vehicle Wrap Repair
Fleet managers can make repairs easier when they give every team a clear process for documenting damage and handling graphics repair.
A strong process should include:
1. Photograph the vehicle before anyone removes anything. Start with the full vehicle, then capture the damaged area, unit number, and close-ups.
2. Identify the exact asset. Next, match the damage to the VIN, unit number, location, and graphics version.
3. Confirm which graphics the damage affected. Do not rely only on the body shop’s repair scope. Instead, check the graphics separately so nothing gets missed.
4. Check the compliance markings. DOT numbers, reflective graphics, safety decals, and other required markings may also need replacement.
5. Use approved artwork and material specs. Whenever approved files already exist, use them. That helps the team avoid recreating brand graphics from scratch.
6. Coordinate the timing with body repair. New paint, surface prep, and vehicle availability can all affect when graphics can go back on the vehicle.
7. Require final proof photos. Before closing the job, confirm that the repaired graphics match the approved layout.
Why This Matters More for Large Fleets
For a small business with one or two vehicles, the team can usually manage a graphics repair by hand.
But with larger fleets, the process gets harder fast.
A national fleet may have hundreds or thousands of vehicles spread across different regions. Damage can happen in several markets at once. Different body shops may handle the repairs. Local teams may not know which brand standards to follow.
That is when centralized records matter. They give everyone the same information before repairs start, while work is happening, and after the vehicle goes back on the road.
Fleet graphics are not just a design file. They are part of the asset history. When damage, repairs, removals, rebrands, or replacements happen, someone needs to know what changed and whether the vehicle was restored correctly.
How Signature Helps With Vehicle Wrap Repair and Documentation
Signature Graphics keeps fleet graphics programs organized before, during, and after installation.
When damage happens, we help teams connect the vehicle, the approved artwork, the damaged area, the replacement graphics, and the final proof of completion.
That visibility matters when several teams touch the same repair.
The goal is simple: repair the vehicle, restore the brand correctly, and prevent confusion the next time that asset needs service.
Use this checklist to document damage, guide repairs, and help protect brand consistency.
FAQs About Vehicle Wrap Repair
Can you repair a damaged vehicle wrap?
Yes. In many cases, a graphics provider can repair a damaged vehicle wrap by replacing the affected section or panel.
However, the right approach depends on a few things: where the damage happened, how old the existing graphics are, what material the original wrap used, and whether the vehicle also needs body or paint repair.
Does insurance cover vehicle wrap repair?
It depends on the insurance policy, the claim, and how the team documented the graphics.
Because coverage can vary, fleet managers should check with their insurance provider. Still, good photos, installation records, and repair documentation can help show what the damage affected and what needs replacement.
Can you replace only one section of a vehicle wrap?
Sometimes. If the damage affects one isolated area, the graphics provider may be able to replace only that section.
However, a partial repair does not always blend perfectly. Color aging, panel alignment, material availability, and design placement can all affect whether the repaired section matches the rest of the vehicle.
What photos should I take after fleet vehicle damage?
Start with full photos of the vehicle from every side. Then take close-ups of the damage, the unit number, the VIN or license plate, and any affected graphics.
Also, capture decals, reflective markings, compliance information, and any brand details that may need replacement.
Should vehicle graphics come off before body repair?
In many cases, yes. The body shop may need to remove damaged graphics before it repairs or paints the vehicle.
Because timing matters, the body shop and graphics provider should coordinate the work. That way, the repaired surface is ready when new graphics need to go on.
How long does vehicle wrap repair take?
The timeline depends on the damage, artwork availability, material availability, body shop schedule, paint cure time, and installation access.
However, approved artwork and clear documentation can help the team avoid delays and move the repair forward faster.
If you’re researching custom decal cost, you’re likely in the early stages of planning a project. The real question isn’t whether to move forward. It’s how to budget appropriately and choose a partner who understands the variables involved.
In 2026, decal pricing can be estimated more accurately when key factors like size, materials, production method, and installation are considered. The sections below outline the most common pricing drivers and how thoughtful decisions can help avoid premature failure or unexpected replacement costs.
Custom Decal Pricing in 2026 (What You Could Expect to Pay)
Decal Type
Typical Size Range (Approx.)
Typical Cost Range
Small decals (logos, labels)
~ 3″x3″ to 6″x6″
$5 – $30 each*
Medium decals (doors, panels)
~ 12″x12″ to 24″x24″
$25 – $100 per decal*
Large decals (vehicle sides, trailers)
~ 24″x36″ up to 48″x96″
$100 – $500+*
Fleet decals (bulk programs)
Varies by standard spec
Lower per-unit pricing at scale
The pricing ranges are general estimates and can vary based on material selection, production method, quantity, and installation requirements.
If someone can quote your decal project without asking a few foundational questions, that’s a red flag. Custom decal pricing isn’t one-size-fits-all, and the most accurate estimates account for how and where the decal will live in the real world.
The biggest cost drivers come down to size, placement, surface type, and material quality. Overlooking any of them usually leads to premature failure or unexpected rework.
1. Size, Placement & Surface
The physical size of a decal is only part of the equation. Where the decal is installed matters just as much.
Flat, smooth panels are the most cost-effective surfaces. As soon as a decal needs to wrap around curves, rivets, seams, recessed panels, or high-impact areas, both material requirements and installation time increase. Door decals, hood graphics, and trailer sides all behave very differently once exposed to road conditions.
High-visibility placements (like driver doors, rear doors, or trailer sides) also demand greater precision. These areas are read up close and at speed, meaning misalignment, bubbling, or edge failure is immediately noticeable and reflects directly on your brand.
From a pricing standpoint, complexity adds cost because it requires:
higher-performance vinyl
more experienced installers
additional prep and positioning time
That extra investment ensures the decal actually lasts as long as expected.
2. Material Quality (This Is Where Corners Get Cut)
Material choice is the single most common place vendors cut costs. And where buyers pay for it later.
Low-cost vinyl may look fine at install, but it often fails early due to:
fading
cracking
edge lift
adhesive breakdown
Premium vinyl is engineered for vehicle use. It’s designed to flex with the surface, withstand UV exposure, and maintain color consistency over time.
High-quality decal materials:
last longer, even in harsh conditions
remove cleanly, protecting vehicle paint
maintain brand integrity across an entire fleet
Cheap vinyl costs less upfront. Until you’re replacing decals sooner than planned, dealing with inconsistent branding, or paying for removal and reinstallation.
When evaluating custom decal cost, material quality isn’t an upsell. It’s a risk management decision. evolving demands of electric mobility.
3. Quantity & Consistency
Ordering decals one-off is one of the fastest ways to drive custom decal cost up and consistency down. Every unique order introduces new setup time, production variables, and opportunities for error.
Standardized fleet decal programs solve this. When artwork, materials, and specifications are locked in, production becomes faster, pricing becomes more predictable, and brand execution stays consistent across every vehicle and location.
From a cost standpoint, volume drives efficiency:
setup costs are spread across multiple units
per-unit pricing drops significantly
reorders are faster and less expensive
From a brand standpoint, consistency ensures every vehicle looks intentional, professional, and on-brand. No matter where it’s installed.
For growing fleets or multi-location organizations, this approach isn’t just cheaper. It’s smarter.
4. Installation (The Most Underrated Cost Factor)
Even the best materials can fail if they’re installed poorly. Installation is often treated as an afterthought, but it’s one of the biggest drivers of decal performance and lifespan.
Common installation issues, such as improper surface prep, incorrect temperature conditions, or rushed application, lead directly to peeling, bubbling, edge lift, and early failure. When that happens, the cost of replacement quickly exceeds what was saved upfront.
Professional installation protects your investment by:
ensuring proper adhesion and placement
reducing the risk of premature failure
eliminating costly rework and downtime
maintaining brand consistency across all vehicles
For fleets, professional installation isn’t an upgrade. It’s how you ensure decals perform as expected everywhere they’re deployed.
Custom Decals vs. Vehicle Wraps: Choose the Right Spend
Decals and wraps serve different purposes, and choosing the right solution ensures you’re investing where it makes the most impact.
Custom decals are ideal for:
logos and branding elements
DOT numbers and compliance markings
clean, repeatable fleet identification
Option
Typical Cost
Custom decals
Hundreds per vehicle*
Partial wraps
$1,000 – $3,000+*
Full wraps
$3,000 – $6,000+*
Decals offer flexibility and efficiency, especially for fleets that need consistent branding without full vehicle coverage. Wraps are better suited for full visual transformations or high-impact marketing campaigns.
Not sure which approach makes the most sense for your fleet?
The lowest quote almost always comes with tradeoffs. Inferior materials, rushed production, and minimal quality control may reduce upfront cost. But they significantly increase risk.
Those shortcuts often lead to:
early decal failure
unexpected downtime
reprints and replacements
inconsistent branding across vehicles
Professional decals are designed to perform in real-world conditions. When produced with quality materials and installed correctly, they last longer, look better, and reduce total cost over time.
If decals are representing your brand on the road, they should perform like a long-term investment. Not a short-term fix.
The Warranty Question (And Why It Matters)
Not all decal warranties are created equal. And many don’t protect what actually fails in the real world.
High-quality decal programs use full-system warranties that cover the entire graphics system, including:
vinyl film
ink
overlaminate
This matters because decals don’t fail in isolation. Most failures happen when components don’t work together. For example, when ink isn’t compatible with the film, or when laminate protection breaks down before the vinyl does.
A full-system warranty ensures every component is engineered to perform as a unit, delivering:
predictable lifespan
consistent appearance
reduced risk of premature failure
protection against costly reprints and replacements
For fleets and high-visibility branding, warranties aren’t a nice-to-have. They’re how you protect your budget and your brand long-term.
Accurate custom decal cost starts with the right information. The more details provided upfront, the faster and more precise your quote will be. With no surprises later.
To price your custom decals accurately, we’ll need:
vehicle type(s) and quantities
approximate decal size and placement
artwork or logo files
installation locations
This allows us to account for material selection, production requirements, and installation complexity, ensuring the numbers you receive are real, not rough estimates.
You’ll hear back with clear pricing and a recommended approach. Not guesswork.
What Most Companies Spend on Custom Decals in 2026
While every project is unique, most organizations fall into these ranges:
Small projects: a few hundred dollars
Vehicle decals: several hundred dollars per vehicle
Fleet programs: optimized pricing with long-term cost efficiencies
The key takeaway isn’t just the number. It’s the value behind it. When decals are critical to brand visibility, compliance, or professionalism, cutting corners almost always leads to higher costs over time.
If your decals matter to your business, choosing the lowest quote is rarely the smartest decision.
Why Companies Choose Signature Graphics
Companies work with Signature Graphics because they need decals that perform consistently across vehicles, locations, and time.
Our approach includes:
National fleet branding expertise built for scale
Premium materials backed by 3M warranties
Centralized production paired with nationwide installation
We don’t just print decals. We manage the entire process to ensure your brand shows up correctly, consistently, and confidently. Everywhere it goes.
Frequently Asked Questions
1) How much do custom decals cost in 2026? Most custom decals range from $5 to $500+ depending on size, material, quantity, and whether installation is included. Fleet programs often reduce per-unit cost through standardization and volume pricing.
2) What’s the biggest factor that affects custom decal cost? After size, the biggest cost drivers are surface complexity and material quality. Curves, seams, rivets, recessed panels, and high-impact areas require higher-performance vinyl and more install time.
3) Are cheap decals worth it? Usually not for vehicles or fleets. Lower-cost materials can fail early (fading, cracking, edge lift), which increases total cost once you factor in removal, replacement, downtime, and brand inconsistency.
4) How much does installation add to the cost? Installation cost varies by vehicle type, placement, access, location, and surface complexity. Professional installation reduces the likelihood of premature failures like bubbling, peeling, and edge lift—protecting your investment long-term.
5) How can I get the most accurate decal quote? Provide: vehicle type(s) and quantities, approximate size and placement, artwork files, and installation locations. The more complete the inputs, the more accurate the price—and the fewer surprises later.
6) What’s the difference between custom decals and vehicle wraps (cost-wise)? Decals typically cost hundreds per vehicle depending on coverage and install. Wraps are higher investment: partial wraps often start around the low thousands, and full wraps can be several thousand depending on vehicle and design coverage.
7) Does ordering in bulk lower custom decal pricing? Yes. Standardized fleet programs reduce per-unit cost because setup and production efficiencies scale across higher quantities. Bulk ordering also improves brand consistency across vehicles and locations.
8) What should a decal warranty cover? The most reliable warranties cover the graphics system, not just one component—typically the film, ink, and overlaminate—because real-world failures often happen when components don’t perform well together.
*Each individual project is different and prices shown are in no way a solid bracket to set a pricing expectation. Prices may be lower or higher than the listed range depending on material, square footage, location, and material/ labor availability.
Most enterprise brands have tight control over their digital presence.
Brand standards are documented.
Creative is reviewed.
Campaigns are measured.
But once the brand leaves the screen and hits the road, something changes.
Visibility drops.
And for many organizations, control stops.
When Your Brand Goes Mobile, Control Often Stops
Fleet vehicles are one of the most visible brand surfaces many organizations own. They move through neighborhoods, cities, campuses, job sites, and customer locations every day.
Yet many marketing leaders can’t confidently answer basic questions about them:
What’s live right now?
Where is it installed?
Is it still on-brand?
Has anything been damaged, removed, or replaced?
At small scale, this might feel manageable.
At enterprise scale, it becomes something else entirely: a brand governance gap.
Fleet Branding is Still Managed Like a Project, But it Behaves Like a Channel
The core issue is not effort. It is mindset.
Fleet graphics are often treated like a one-time production task:
Approve the design
Install the graphics
Move on
But fleet branding doesn’t behave like static signage.
Vehicles rotate. Campaigns change. Installations happen across regions, vendors, and timelines. Graphics wear, peel, or get removed.
This makes fleet branding far closer to a live marketing channel than a completed project. It is public, persistent, and rarely audited.
The Hidden Cost of Low Fleet Visibility
Without centralized visibility, teams are forced to rely on assumptions:
That installs were completed correctly
That vehicles still look right
That standards are being followed everywhere
The result is more than inconsistency. It is risk:
Missed or incomplete rollouts
No proof of execution
No real-time status for leadership
No reliable reporting for marketing teams
Because fleet branding sits ourside traditional marketing technology stacks, these gaps often go unnoticed.
Until something goes wrong.
How Leading Brands Govern Fleet Branding
High-performing marketing organizations are changing how they approach fleet programs.
They are not just approving creative. They are governing execution.
That shift requires real visibility:
Knowing what is live, not just what was planned
Seeing installs as they happen, not months later
Tracking assets at the vehicle level, not just the vendor level
Creating accountability after creative approval
This is the gap brandRESPONSE was built to close.
How brandRESPONSE Solves the Fleet Visibility Problem
brandRESPONSE is a proprietary platform designed to give enterprise marketing teams real-time visibility and control over fleet branding programs.
Instead of managing fleet graphics through spreadsheets, emails, and vendor updates, brandRESPONSE provides a centralized system of record that shows:
What is live across your fleet
Where assets are installed, down to the vehicle level
Status updates throughout each rollout phase
Photo-verified installs for proof of execution
This turns fleet branding into a governed marketing channel, not something teams simply hope is working.
From Blind Spot to Governed Channel
With brandRESPONSE fleet branding stops being “out of sight, out of mind.”
Marketing teams gain:
Confidence in execution
Visibility for leadership
Accountability across regions and vendors
A direct connection between strategy and real-world deployment
Most importantly, fleet vehicles are treated like what they already are: a high-impact brand channel, not a production afterthought.
Do You Have Visibility Into Your Fleet Today?
Can you confidently see how your brand is showing up on the road right now? Or are you relying on assumptions?
If it is the latter, you are not alone. But you do not have to stay there.
Learn how brandRESPONSE gives marketing leaders full visibility and control over fleet branding programs.
Discover how reflective fleet graphics improve the visibility and safety of police vehicles, especially in low-light conditions, ensuring better protection for law enforcement officers and the public.
Ever driven down a dark road and spotted a police vehicle just in time to slow down? That split-second recognition is no accident. Reflective fleet graphics play a crucial role in conspicuity of a police vehicle, especially in low-light or at night. These graphics improve the safety of officers and protect the general public by making police vehicles infinitely more visible. Let’s delve into why visibility is so important and how reflective wraps make a difference.
The Importance of Visibility for a Police Vehicle
Visibility is at the core of safety with respect to law enforcement officers. Police vehicles may be used in various environments and conditions where visibility is challenged. The ability for officers to be seen and to see determines their and other individuals’ safety. Let’s take a look at certain specific conditions where visibility plays an important role:
Night Patrols: Darkness greatly reduces the ability to see and be seen. Hazards associated with poor visibility are at their maximum during night patrols. Reflective graphics make police vehicles stand out on the darkest of nights. They will catch light and reflect it from street lamps, vehicle headlights, and other similar sources of light to give a clear impression of the vehicle in view. This increases the visibility of such a vehicle, which prevents accidents because other drivers can see this vehicle in good time and react accordingly. Moreover, it gives a sense of security to the community; they feel that the area is under protection since patrolling does not stop at any given time.
Poor light conditions: These are the hours of dawn and dusk, as well as adverse weather such as rain and fog that limit visibility. When it is at this time of day, combined with elements of the weather, it really turns out to be a nightmare for police work. In this environment, reflective material returns all the available light and shines very brightly, drawing attention to the vehicle. The reflective graphics are helpful in conditions of fog, where visibility may drop very low. It allows visibility of police vehicles to other drivers so the risk of collision can be reduced with a quicker response time. In wet weather, it helps to maintain visibility because the surfaces are reflected, showing that the vehicle can be seen even when the road and all around it are dark and wet.
And Most Importantly:
High-Risk Situations: High-risk situations, in cases of traffic stops or emergency responses, can mean the difference between disaster and bringing the driver to an appropriate speed with caution. Oftentimes, these high-risk situations arise right in the middle of busy roads and highways where fast-flowing traffic could spell danger for both the officer and the community. In such situations, instant recognition of police vehicles is possible because of reflective graphics, giving off a type of signaling that puts drivers on notice to be cautious. Whether a high-speed chase is going on, somebody is calling for roadside assistance or whether there is an upcoming checkpoint, quick identification of police presence eases in handling the traffic flow for the protection of all.
How Reflective Wraps on Your Police Vehicle Improve Safety
Reflective wraps provide a police vehicle with visibility under any condition and thus make it more secure for police officers and the public. This is how they do it:
Light Reflection: Reflective materials are engineered to reflect light back to its source. When headlights or streetlights hit these materials, they shine very brightly and draw all attention to the vehicle. Such a property of reflective wraps is most essential during dark hours of the evening or in areas with dim lighting. The light-reflecting quality ensures that the vehicle is visible from a farther distance. This gives other drivers more than enough time to react responsibly. Through effective reflection of light, these wraps create a glowing effect. This ensures that the vehicle is unmissable, regardless of the lighting in the specific environment.
Enhanced Visibility: High-visibility graphics will ensure that the vehicles are recognizable from far. Quick identification can be a matter of life or death in emergency situations. Immediate recognition of a police vehicle can make all the difference in a high-stress situation, such as a pursuit or a roadside incident, if people and other drivers do not take action. Recognizable graphics help avoid confusion, and in turn, they allow other drivers to act—slow down and yield, among others. In addition, enhanced recognition allows for the fast coordination of the police. So that they can easily find themselves in an operation.
And Another Thing to Consider About Your Police Vehicle
Professional Look: Reflective wraps provide a clean, professional image that maintains the authority and respect commanded by law enforcement vehicles. An effectively designed reflective wrap should do more than just increase visibility; it should maintain the appearance of the vehicle. This professional appearance is crucial in establishing the police force as a presence of authority. It is definitely a sure way that the vehicles will be taken seriously. And commanded respect by the public at large. An across-the-board uniform and professional look throughout the entire fleet helps distinguish the police department. Setting it out as an authoritative brand image that fosters confidence and trust among the community.
Additional Advantages: Besides the overt benefits of safety and recognition, reflective wraps really do have other benefits. They add to the longevity of exterior materials of a vehicle, acting as another armor against all but the most severe scrapes and UV damage. This protection ensures the appearance of the vehicle over time, thus reducing the cost of frequent repainting or repairs. Reflective wraps can also be customized, which makes them versatile for police departments to incorporate the specific branding elements, logos, and information that will help with their visibility and public relations efforts.
Operational: There are success stories that have been reported by police agencies across the country from the application of reflective wraps. For example, there are fewer cases of accidents experienced with police cars at night because of an improved visibility factor. Secondly, in the policy approaches to police community relations, reflective wraps enhance the police presence and visibility across neighborhoods, guaranteeing security and comfort for every resident.
Benefits of Reflective Fleet Graphics on a Police Vehicle
There are many advantages to implementing reflective fleet graphics for law enforcement agencies:
Greater Officer Safety: The primary benefit is that it offers increased officer safety. Reflective wraps ensure that the police vehicles are visible to other motorists, thereby reducing the chances of a crash. Being visible is crucial, especially when there are low lights or at night. As long as a vehicle is seen from afar, the chances of an accident occurring are highly minimized. This increased visibility helps other drivers on the road to quickly identify police vehicles, prompting them to take necessary precautions. Reflective wraps enhance officer safety during traffic stops, roadside assistance, and emergency response by ensuring they can perform their duties safely. They achieve this by preventing collisions.
Public Safety: By making the police vehicle more conspicuous, the public is more likely to respond appropriately. For instance, when the police are on some operations, drivers are likely to slow down and be cautious. Reflective graphics provide a clear identification of a police car, which can influence driver behavior. When drivers notice an illuminated reflective police car, they tend to be more observant. They slow down and become more aware of their surroundings. This behavior protects not only the officers but also other drivers and road users. Additionally, increased visibility can deter potential criminal activities since police officers are more visible on the streets.
Additional Benefits
Durability and Longevity: Reflective wraps are specifically designed to withstand inclement weather conditions. And also aid in preventing daily wear and tear, ensuring long-lasting visibility. High-quality reflective wraps are built to endure various environmental factors like rain, snow, and UV rays. They remain effective and prominent for many years without significant degradation. Their robustness guarantees that they won’t peel, wear off, or fade quickly. This reduces the need for frequent replacements, saving time and resources for law enforcement agencies.
Cost-Effective: While the initial investment may be higher, the long-term benefits of reduced accidents and improved safety make reflective wraps highly cost-effective. Investing in reflective graphics helps law enforcement agencies save money. In the long run, this can prevent vehicle repairs, medical bills, or potential legal costs. The durable nature of the material also means less maintenance costs for frequent replacements. Reflective fleet graphics represent a sound investment due to their enhancement of safety and the potential reduction in liability.
Professional Appearance and Community Trust: Reflective wraps provide a clean, professional appearance. This provides law enforcement vehicles a higher level of authority and respect. A well-maintained fleet with high-visibility graphics not only looks professional but also helps build trust within the community. Citizens are more likely to respect and cooperate with officers when their vehicles present a polished and authoritative image. Moreover, this professional appearance can aid in community policing by fostering a better relationship between law enforcement and the public.
Conclusion
In brief, reflective fleet graphics are important to enhance the visibility of law enforcement vehicles. And, in turn, they help improve safety. These wraps draw attention to the police cars, even in low-light conditions. Therefore safeguarding the officers and, by extension, the public. Using premium quality reflective materials will show commitment to the well-being of the community. And to the officers serving this community. If you are considering replacing or upgrading your police vehicle, consider associating with an expert. They can provide high-quality and effective solutions with care.
FAQs
1. What are reflective fleet graphics?
Reflective fleet graphics are high-visibility wraps and decals designed to reflect light, making police vehicles easily noticeable in low-light conditions.
2. How do reflective graphics enhance safety for law enforcement officers?
By improving the visibility of police vehicles, reflective graphics reduce the risk of collisions and ensure that officers are easily recognized during night patrols and in low-light environments.
3. Are reflective wraps cost-effective for law enforcement agencies?
Yes, while the initial cost may be higher, the long-term benefits of enhanced safety and reduced accidents make reflective wraps a cost-effective investment.